

Spring planting of gladioli in open ground: timing of planting bulbs, basics of care and cultivation
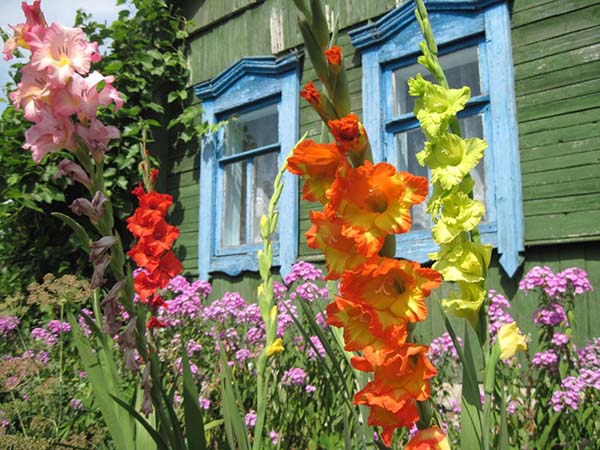
Gladiolus is as decorative as labor-intensive. After all, they must not only be planted and carefully looked after all summer, and then properly dug up and processed in autumn, but also preserved in winter.
Further, you can learn in detail about all the nuances and secrets of growing gladioli in the open field, from the choice of planting material to its collection and subsequent storage.
Content
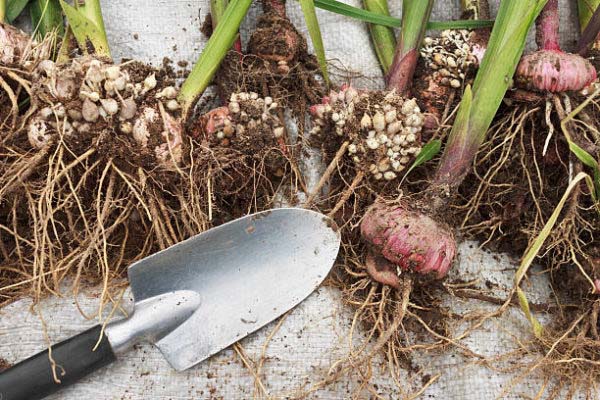
How to choose gladiolus bulbs and prepare them for planting
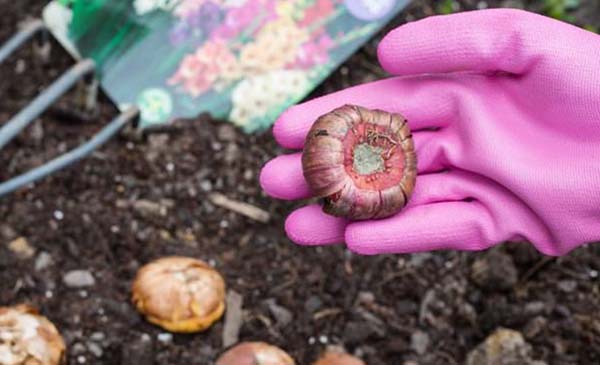
To start growing gladioli in your summer cottage, you must first either purchase them in a specialized store or at a garden fair, or order them online (in which case they will be sent to you by mail). The first option is preferable becausein this case, you can personally verify the quality of the purchased bulbs.
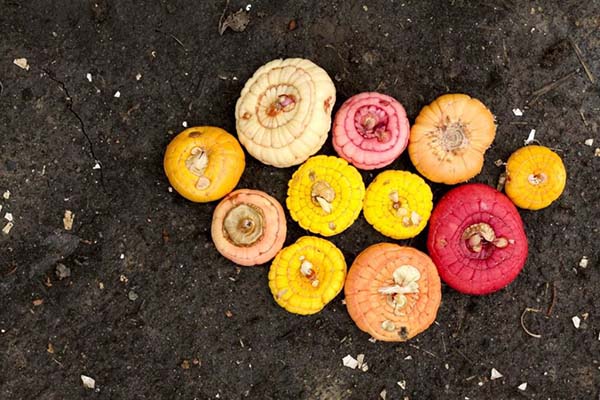
Several recommendations for choosing gladiolus bulbs:
- It is advisable to buy bulbs with one fairly powerful sprout in the middle (with a maximum of two). If there are 3 or more sprouts on the bulb, then most likely it is sick with such an incurable disease as grassiness.
Do not pay attention to specimens that are too flat. No sprouts and tubercles.
- Root tubercles must be already formed and always light in colorbut not brown.
- As for size, you need bulbs with a diameter from 2 to 4 centimeters, and the bottom diameter should be from 3 to 7 mm.
You definitely do not need large ones with a strongly concave bottom. This is a clear sign that they have already been planted more than once, which means they can hardly give powerful inflorescences and good offspring.
- Naturally bulbs not should have no even the slightest signs of disease (mold).
Video: an overview of popular gladiolus varieties
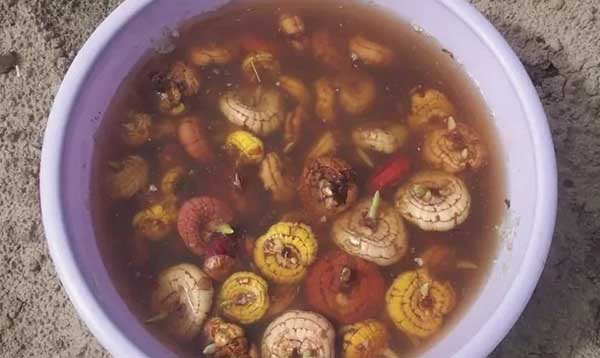
Preparing the bulbs for planting
Let's say that they can correctly select and buy high-quality gladiolus bulbs. Now you need to properly prepare for planting in the ground.
Note! The site already has a separate article about how to prepare the bulbs for planting, including how (by what means) to process.
The technology of planting gladiolus in the spring in open ground
When to plant in open ground: optimal timing
The optimal timing for planting gladioli in the open ground in spring is end of April until early June months depending on the climatic characteristics of the region.
So, in the Middle zone (Moscow region), it is advisable to plant in mid-May, and in the South of the Volga region (for example, in Volgograd) it is possible already in mid-late April.
The general rule that determines the time of planting gladioli in open ground (for all regions, including the Leningrad region, the Urals and Siberia) is the moment when the soil at a depth of 1/2 shovel bayonet (10-12 cm) warms up to 10 degrees. Naturally, by this time the threat of possible return spring frosts should have passed.
People's omen! As soon as the birch leaves look like a five-kopeck coin, it's time to start planting gladioli on a garden bed in open ground.
According to the lunar calendar in 2021
Important! Planting gladiolus bulbs in a pot (for germination at home) is also recommended in accordance with the lunar calendar.
Choosing the best date for planting the bulbs can help you Moon calendar.
So favorable days for the spring planting of gladioli bulbs in 2021 according to the lunar calendar are:
- in March - 8-12, 26-31;
- in April - 7, 9-15, 17-22, 27-30;
- in May - 2-6, 9-12, 20, 21, 29-31;
- in June - 7-9, 11-14.
Unfavorable days according to the lunar calendar for 2021 for planting gladiolus bulbs in spring are the following dates (days of the Full Moon and New moons, as well as the period when the Moon is in Aquarius, because it is a barren and dry sign -italicized):
- in March -9-10, 13, 28;
- in April -5-6, 12, 27;
- in May -2-4, 11, 26, 30-31;
- in June -10, 24, 26-27.
Place and necessary soil
To plant gladioli, you need to choose the most illuminated and sunny place in the garden. At the same time, gladiolus, of course, can be successfully grown in a shaded flower bed, but the flowering will not be as abundant as with constant sunlight.
Advice! Experienced flower growers do not recommend planting gladiolus in the same place for more than 3 years. It is much better if you change its place of growth every year.
Vegetables are good predecessors for gladiolus.
Gladiolus cannot be called a whimsical plant in relation to the land in which it is grown, so virtually any soil is suitable for planting it. You just need to remember that if you have light and airy soil, you will have to water more often, heavy soil - you will need regular loosening.
Gladioli do not tolerate excessive waterlogging of the soil, so they need good drainage. If the soil in your garden is heavy, it is recommended to add compost or rotted manure to it. Also, experts do not advise making a garden bed in a place where water often stagnates. Without a doubt, a slightly raised flower bed is more suitable for him.
By the way! If you introduced organic matter into the soil when you grew vegetables in the same place, then you do not need to do this before directly planting flowers.
Landing on the garden
Planting gladioli is very similar to planting potatoes, so if you have the appropriate experience, then there should be no difficulties with planting them in spring.
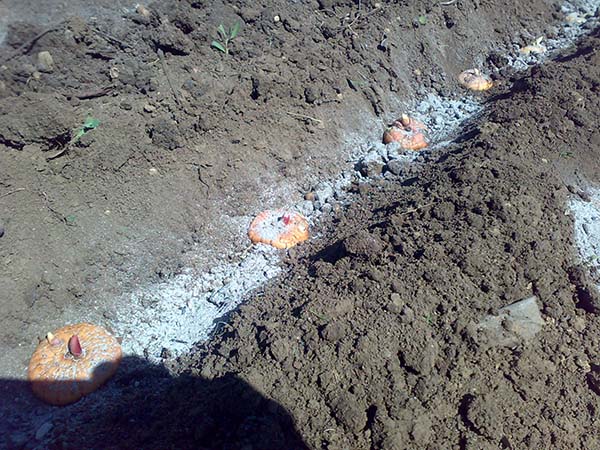
Planting gladioli is very convenient in pre-prepared trenches (or separate holes) 3 diameters deep, so it is recommended to select bulbs of the same size (for example, if your gladiolus bulb is 3 cm in diameter, then the planting depth should be 9 cm).
Note! The deeper the bulb is planted, the more beautiful and magnificent the flower will be. The higher, the more children there will be. But it is impossible to deepen more than 12-14 centimeters, because the ground there no longer warms up, and the bulb will develop poorly.
Before planting, the trench must be shed with water, into which you can add a little extracts from horse manure, and you can also treat (disinfect) the soil with Fitosporin solution.
Important! Many gardeners recommend pouring 1-2 cm of sand into the trenches (grooves), and then sprinkle them lightly, in other words, create a so-called sand capsule.
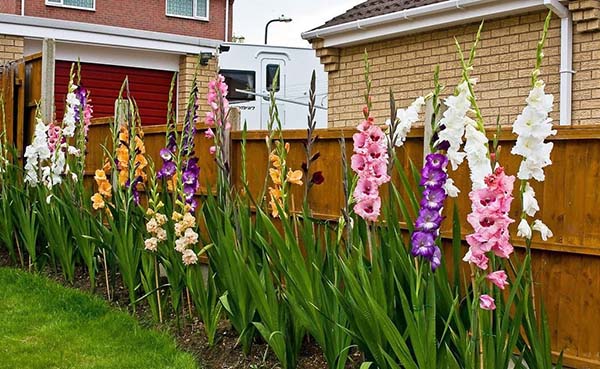
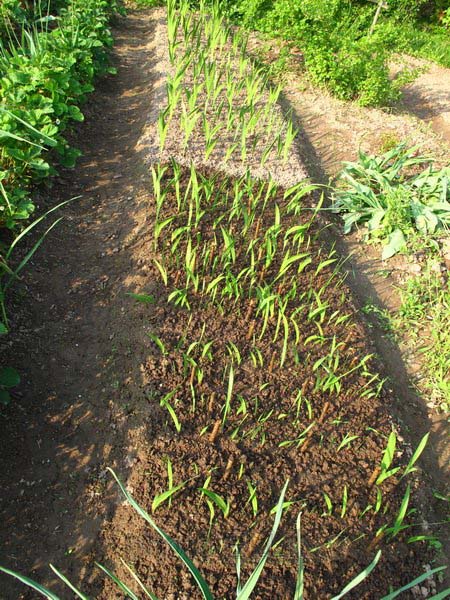
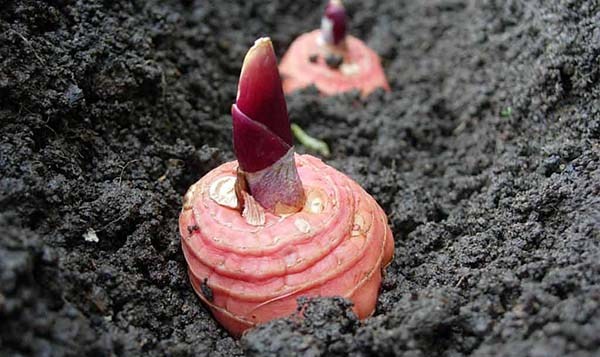
After the water is absorbed, you can begin to spread the bulbs in the trench (sprout up, bottom down). The optimal distance between the onions should be about 15-20 centimeters, and between the rows it is worth keeping a distance of 25-30 centimeters.
Now it remains only to cover the plantings with earth. And it is also advisable to mulch the garden, for example, with humus or sawdust in order for the plant to breathe well, the earth around it does not dry out, but is always loose, and moisture remains.
Video: how to plant gladioli correctly
How to care for gladioli after landing in the garden
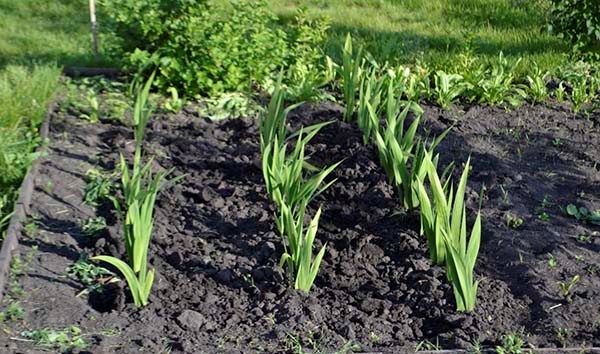
To grow beautiful gladioli, they need proper care, which must include the following garden manipulations: regular watering and loosening, hilling, timely feeding, as well as prevention and active fight against diseases and pests.
It usually takes 2 weeks from the moment of planting to the appearance of the first shoots of gladiolus. At this time, no attention is required to the planted bulb. As soon as the green sprout comes out, it's time to start leaving.
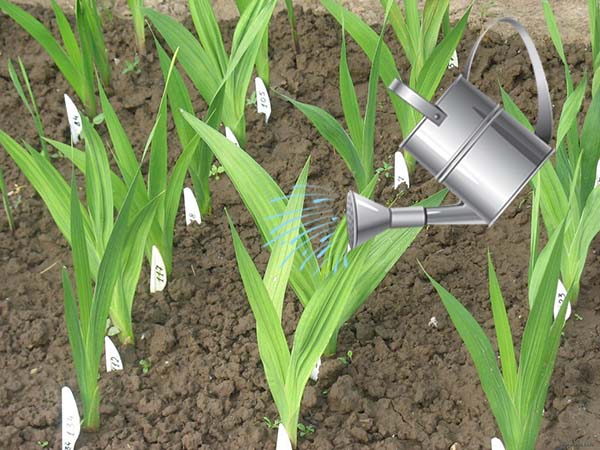
Gladioli are needed often and abundantly to water (approximately every 5-6 days) so that the earth does not dry out. It is advisable to do this so that the soil is soaked 2-3 cm deep. It is best to do this in the evening after sunset. It is especially important to water and moisturize the soil around the flower well when the plant has 3-4 true leaves, because inflorescences develop during this period.
It is necessary in a timely manner loosen soil, weed the beds and remove weeds so that the flowerbed does not overgrow with harmful shoots that spoil the whole species.
As the gladiolus grows up, you need spud.
Advice! If you planted gladioli in already fertile soil, which every year before was well flavored with all kinds of nutritious fertilizers, then feeding is not necessary, unless, of course, the flowers themselves "do not ask."
To have beautiful flowers, gladioli shouldfeed throughout the season. At the beginning (in May-June), it is advisable to feed with ammonium nitrate or other fertilizers with a high content of nitrogen and potassium, and then (in July) with fertilizers containing all the main elements (nitrogen, potassium and phosphorus) in approximately equal amounts, for example, nitroammophos ... At the end of summer (in August), you can already feed only potassium-phosphorus fertilizers.It is desirable to combine top dressing with watering.
Video: feeding gladioli
Important! Fresh manure should not be used as top dressing.
Like any flowers, gladioli can be affected by different diseases and pests.
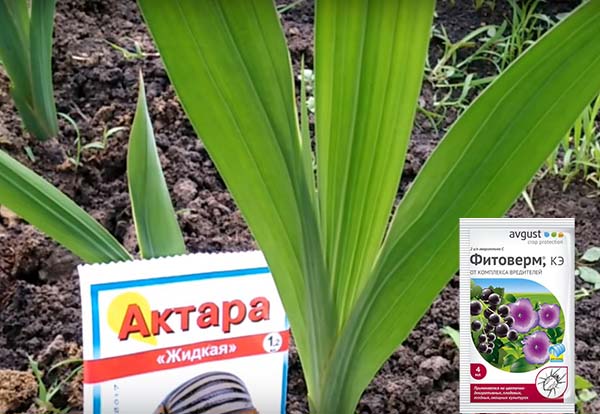
The main diseases that affect the flower are rot of various origins, that is, it can be scab, mosaic, jaundice, bacterial cancer. When they appear, it is worth spraying with such fungicides as Oxyhom, Hom, Copper sulfate, Bordeaux liquid and other similar preparations.
The most malicious pest of gladiolus is thrips. You can use Fitoverm, Antara, Mospilan, Decis, Confidor and other drugs from it.
Naturally, it is much more practical to carry out preventive measures in advance, that is, to process plants and protect them even before diseases and pests appear. This is especially true if you have had a rainy summer. When the flowers get sick, it will be too late to save them. It will only be necessary to get rid of them as soon as possible so that the infection does not spread to healthy specimens.
Experienced gardeners recommend carrying out preventive treatment against the main pest of gladiolus thrips, when the first 3-4 true leaves appear on the flower.
If you do not want to use chemicals, then various decoctions and infusions, for example, tobacco, celandine or yarrow, are suitable for processing. But let's make a reservation right away: they are noticeably less effective, so you will have to do a much larger number of sprays.
As you grow, it is worth exercising garter gladioli in order to prevent negative consequences in case of strong wind. After all, a flower can simply break off, so gladioli should be tied to supports, and a mesh can be put on top.
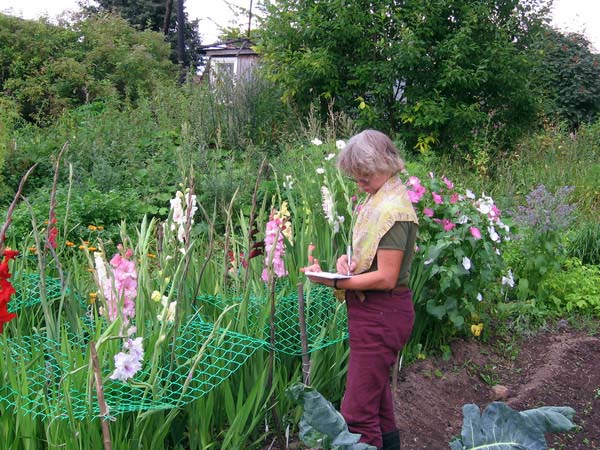
When the gladioli have 2-3 flowers blooming, it's time to cut them (preferably in the early morning or late evening). The rest of the flowers will open themselves a little later in the water.
Cutting should be done as follows:
- Dip the cutting knife into a strong solution of potassium permanganate.
- Count 5 pairs of leaves.
- Make a puncture.
- Unscrew the stem of the gladiolus carefully.
Video: how to care for gladioli
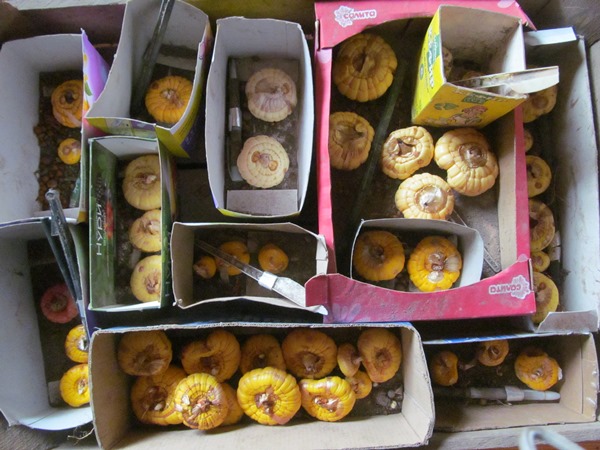
Digging gladiolus bulbs for storage: terms and processing technology, storage methods
When do you need to dig up gladioli?
There are early and late varieties. Accordingly, the ripening of the bulb can occur early and late, depending on the variety.
Advice! About, when to dig up gladioli bulbs and how to store them written in detail in this article.
Thus, now you know what to do in order to grow a wonderful gorgeous gladiolus flower in your summer cottage without any problems. Isn't it true that even a novice florist is able to cope with all the requirements for flower care.
Video: planting gladiolus bulbs