

Propagation of hydrangea by cuttings in summer: the rules of green cuttings
Of course, hydrangea is one of the most beautiful flowering shrubs that every gardener would like to have on his site, and the more, the better. That's why you decided to propagate the hydrangea by cuttings, right?
Next, you will learn how to properly cut a hydrangea in the summer, what is the best way to root the cuttings and when to plant them in open ground in a permanent place.
Content
Propagation of hydrangea by green cuttings
Absolutely all types of hydrangeas are amenable to propagation by cuttings: paniculate, tree-like, large-leaved.
Hydrangea (especially paniculate and tree-like) is quite an easily rooted plant, which means that you should not have any special problems with its reproduction by cuttings.
Note! Reproduction of hydrangea green cuttings much more preferred over lignified.
When to cut, in what time frame
The best time to propagate hydrangeas with green cuttings is second half of June - first half of July (before or at the very beginning of flowering).
In general, the terms can be more flexible (late). The main thing is that the cuttings are green.
Harvesting cuttings
So, in July, you need to find somewhere (for example, ask your neighbors) and cut non-lignified green cuttings of hydrangea.
More precisely, the lower part of the shoot, from where the cutting is taken, should already be semi-lignified. In this case, the stalk itself should be strong enough (as thick as a pencil), but not fat.
But as to whether it is worth taking a shoot on which there is a bud (or a flower has already blossomed), or, conversely, it was not, opinions differ here. Try both!
As always, it is better to choose for grafting morning timeand it is ideal if the weather will be cloudy... The fact is that under such conditions the cuttings will have the maximum amount of nutritious moisture.
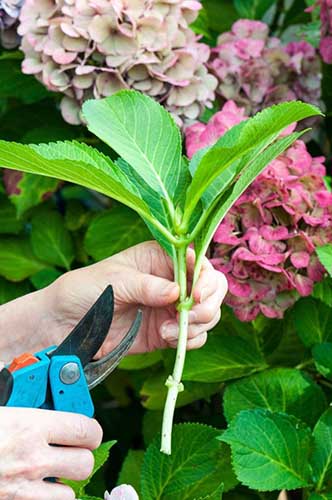
We turn to the direct green cuttings of hydrangea:
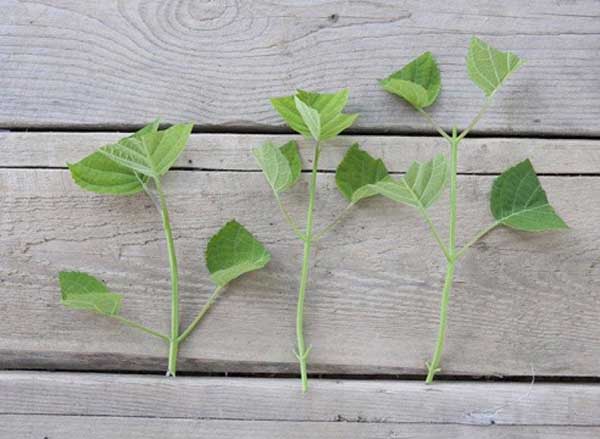
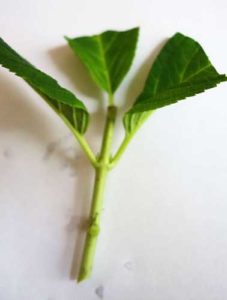
- The shank must have 2 or 3 internodes.
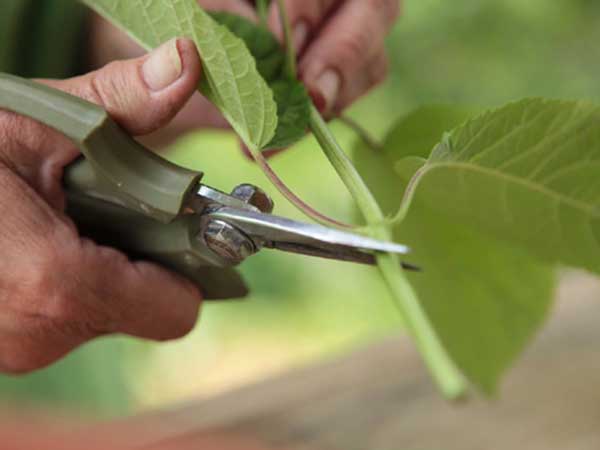
- Under the lower internode (departing from it by about 1 cm) make an oblique cut (at an angle of 45 degrees), above the upper one - a straight cut (departing from the internode itself by 2-3 cm).
- Now you need to remove the lower leaves and cut the upper ones in half (to reduce moisture evaporation).
Interesting! There is a completely opposite opinion regarding the reduction of the leaf surface. So, by reducing the surface of the leaf, you, on the contrary, complicate root formation (since in the absence of roots, the cutting receives all its nutrition through the leaves, and you shorten them).
- Further, for better rooting, the cutting can be held in a solution of one of the root growth stimulants (the same Kornevin or Heteroauxin, Epin or the same HB-101 can be used) or simply dip the lower part of the cutting into powder.
Until the direct planting of cuttings in the ground, they must be kept in water (or a solution of a growth stimulant).
Rooting cuttings
Shortly before direct cuttings, you need to prepare in advance a suitable soil for their rooting and capacity (You can take any, but the main condition is the mandatory presence of drainage holes).
The substrate should be as loose as possible (air and moisture permeable), so it must contain sand (or perlite). Alternatively, you can mix equal proportions of garden soil (or peat) and sand.
Step-by-step instructions for planting green hydrangea cuttings for rooting into the ground:
- Place a drainage layer + a little moistened sand on the bottom of the planting container (for better drainage).
- Fill the pot with soil mixture and tamp lightly.
- Spill with water.
It will be doubly good if you spill it not with ordinary water, but with a solution Fitosporin (for soil disinfection).
- Embed the cuttings into the ground at a slight angle (about half their length or up to the second pair of leaves).
- Water again, and it is better to sprinkle, including the leaves.
- Put a container with cuttings in a place where optimal conditions for their rooting will be created, namely: high air humidity and the absence of direct sunlight, while the temperature should be within + 20-25 degrees.
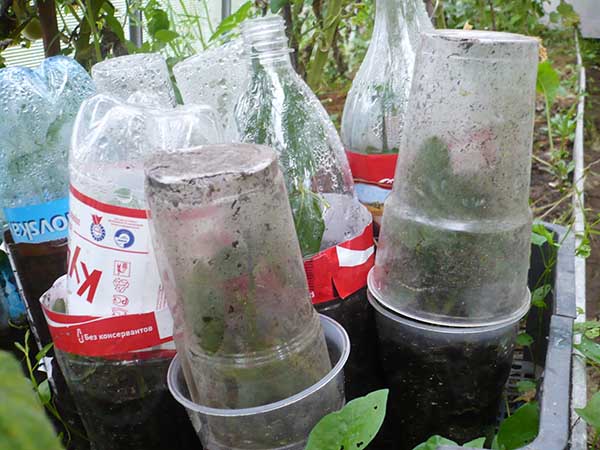
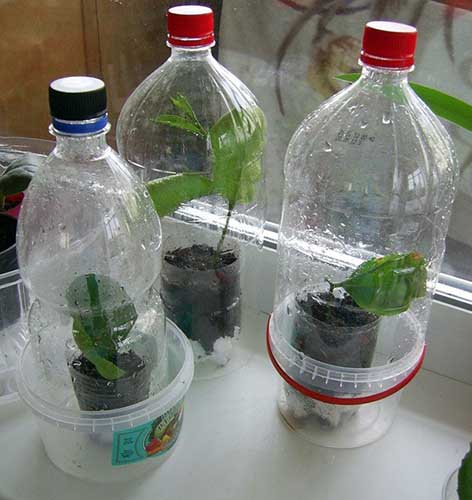
- In other words, you can cover the container with a film or bottle (any other transparent cap), making a kind of greenhouse (greenhouse) and put under a tree (you need a shady place) or in a greenhouse.
Advice! And ideally, it would be nice to make a separate cuttings in your country house (select a bed), where you will initially root the cuttings. In other words, you can plant the cuttings directly into the open ground (in a greenhouse or under the same bottles).
- Further care comes down to maintaining the created favorable conditions, which means that you need closely monitor the humidity (water and spray regularly).
It is very convenient to cover the cuttings with a cut bottle to open the lid in hot weather (for airing).
- On average, after a month (3-5 weeks), with proper care, the cuttings will take root (take root).
Important! The cornerstone of successful rooting of cuttings is the creation and maintenance of a constant high humidity (95-100%), optimally so that there is "fog" in the greenhouse.
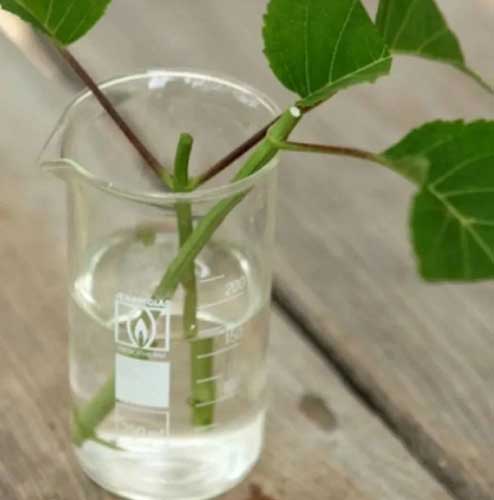
Germination in water
If you are used to initially sprouting cuttings in water, then this should work with hydrangeas too.
However! It is believed that root formation is worse in almost all plants in water. this requires oxygen, and in the water it is only available at the surface, which is why many cuttings simply rot. Therefore, it is always preferable to carry out cuttings in the ground.
In general, the procedure is standard: put the cuttings in the lower part of the water (up to the leaves), and when small white roots grow, transplant them into seedling cups with a loose and nutritious soil substrate.
Landing in open ground at a permanent place
It is possible to transplant rooted cuttings of hydrangea into open ground only after how young leaves will appear and grow, a the roots will fill the entire container volume, i.e. somewhere in 6-9 weeks (1.5-2 months) after grafting, in other words, around September (necessarily 3-4 weeks before night frosts, so that the plants have time to take root in a new place).
However! Before planting plants in a permanent place, it is highly advisable to carry them adaptation. Namely, gradually take out containers with cuttings in the open air, in the sun (removing the greenhouse).
As for the planting technology, you can either immediately transfer from the pots to the planting holes, or temporarily dig in directly in the pots, to transplant to a permanent place in the spring. And after landing, it is advisable to shade with something for a while.
Alternatively, you can even temporarily plant potted cuttings in the rose garden and shelter with the roses (or grapes).
In autumn (before frost) it is very important to properly prepare young hydrangea seedlings for winter. Namely shelter, as an option, with spruce branches (spruce branches) or other covering material (you can cover with spunbond directly on top of the spruce branches).
As you know, paniculate and tree-like hydrangeas winter well, including cuttings (and in adulthood, even without any shelter). It's a completely different matter - large-leaved variety (here it really is needed annually shelter for the winter) .
By the way! If you have space in the basement or cellar, then it is better to bring pots of hydrangeas for the winter. During winter storage periodically slightly moisten the soil surface. And the next spring, without any fear, plant it in the ground.
Propagation of hydrangea by lignified cuttings
As a rule, hydrangea is propagated by green cuttings, but you can try to root (in the same way) and woody cuttings (last year's shoots), which you will have after spring pruning.
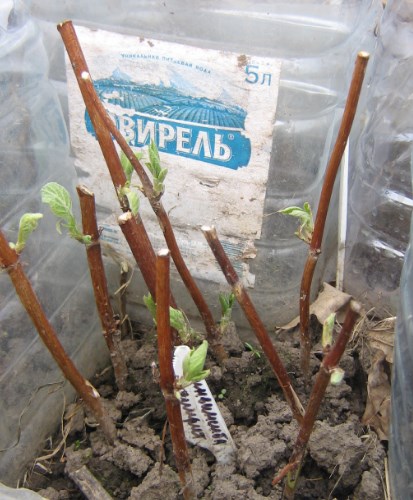
Nuance! You are probably used to the fact that lignified cuttings are harvested in the fall. However, trying to save the cuttings after autumn pruningto plant them for rooting in the spring is rather problematic and pointless, especially if you prefer to prune the hydrangea in the spring.
Useful materials for growing hydrangeas
If you have never had a beautiful hydrangea in your garden before, then the following materials on planting and growing hydrangeas will help you choose the optimal place for placing a flower on the site, as well as in the future to properly care for this wonderful perennial shrub:
- Terms and rules for planting hydrangea seedlings in spring and in the fall;
- Top dressing for lush flowering;
- Spring and autumn pruning;
- Shelter for the winter;
- Autumn care and preparation for winter.
And if your hydrangea began to bloom weakly or does not bloom at all, then it will not be difficult for you to figure out the reasons if you familiarize yourself with this article.

Well, if you really want to breed a hydrangea on your plot, choosing the method of summer cuttings for this, then try to do everything correctly so that the rooting process goes quickly and successfully. Good luck!
Video: propagation of hydrangea by cuttings