

How to plant thuja in open ground in spring: planting rules and growing technology
There is no way to do in a summer cottage without such a popular tree today as thuja. It is no secret that a plant that is friendly to people has an unthinkable number of advantages: it pleases the eye with cheerful greenery, recalling the eternal summer, and the smell, filled with essential oils, and its decorative look beckons (it is not for nothing that it is often used in landscape design). For enthusiastic amateur gardeners, the long-lived thuja is the pride of generations.
To grow and then donate this magnificent evergreen shrub to your grandchildren and great-grandchildren, you need to know a few basic things about planting and caring for thuja in spring. All the features of growing this rather unpretentious "tree of life" are discussed in this article.
Content
Types and varieties of thuja
There are several varieties of thuja, but the most famous are the following types:
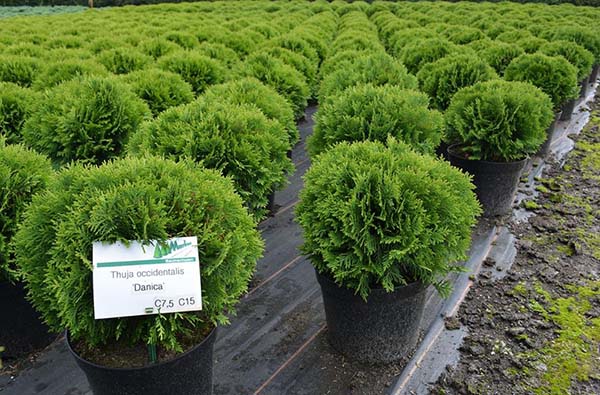
- western (the most famous variety is Smaragd, also common are Brabant, Danica, Teddy);
- eastern.
Important! Western thuja is considered more undemanding to care. Therefore, as a rule, this particular variety is grown here, and especially in the Central lane (Moscow region). However, it is excellent for planting in Siberia and the Urals.
In the form of thuja there are:
- dwarf;
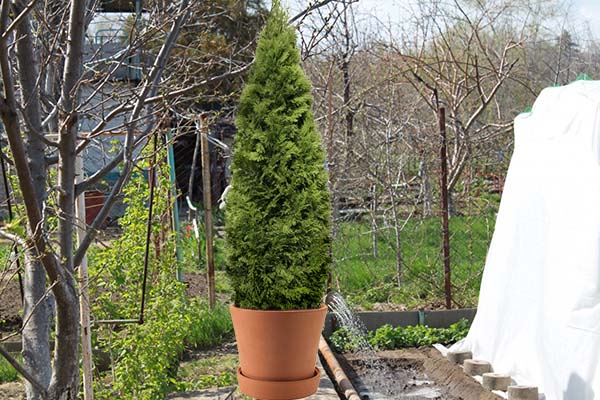
- columnar (pyramidal, conical);
- spherical.
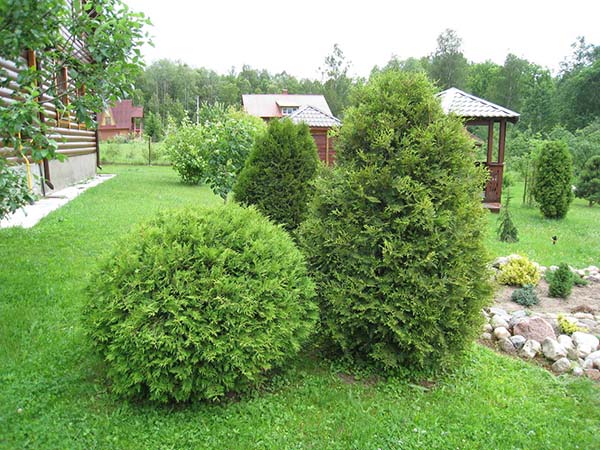
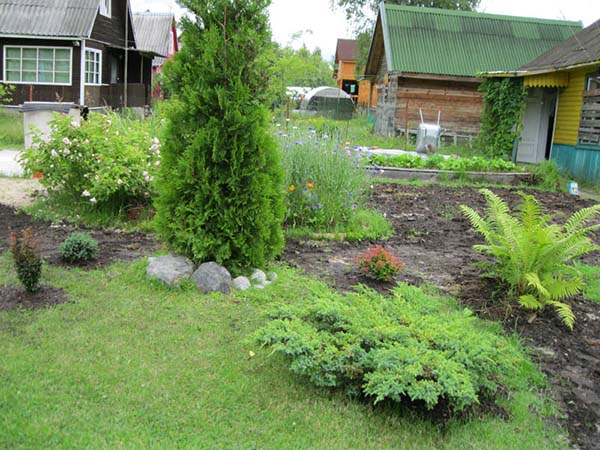
As for the use of varieties of thuja in landscape design, then:
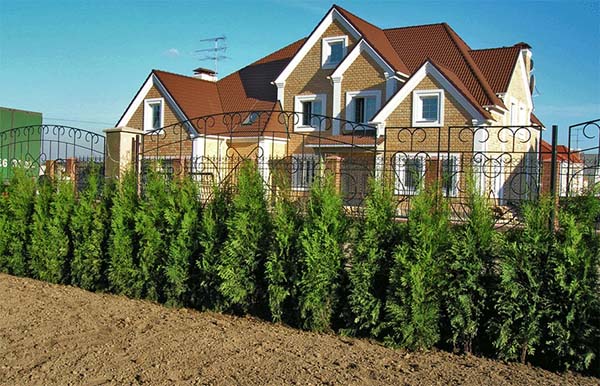
- to make a hedge, you are ideally suited for thuja of a columnar or pyramidal shape (the same Brabant or Smaragd);
- for the design of walking garden paths, spherical thuja, both western (Danika) and eastern, are very useful;

- A rabatka or a small slide will be beautifully decorated with the help of dwarf thujas (Teddy).
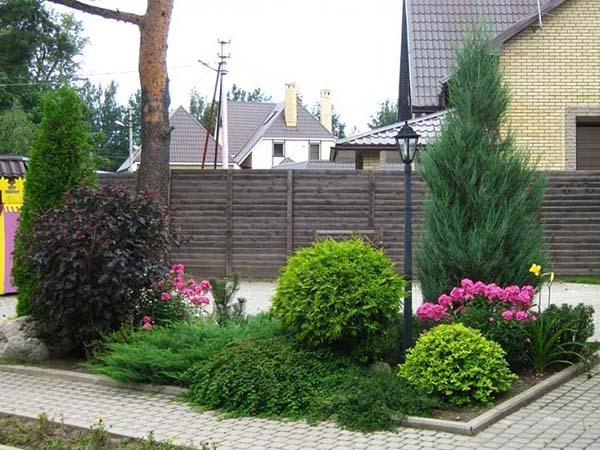 In general, thuja will be beautifully planted next to other conifers, for example, in combination with spruce or juniper.
Video: popular varieties of thuja for the garden
How to choose a good thuja seedling
Thuja seedlings are usually sold with a closed root system. In this case, the seedling can either already grow in a pot (container), or be wrapped in burlap along with an earthen lump. The first option is always preferable, but large (adult) plants, most often, are wrapped in burlap.
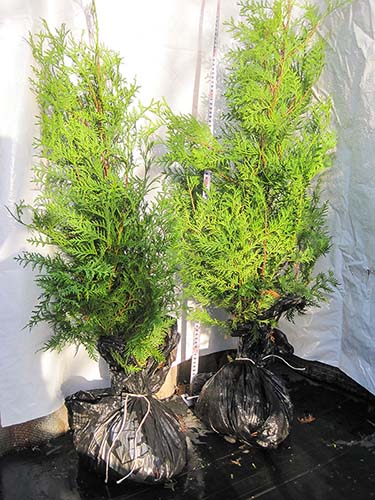
Advice! It is better to buy a younger seedling, up to about 3-4 years. It will grow much faster than a 5-6 year old. A younger tree, planted in the ground, will instantly catch up and overtake the originally taller ephedra.
When examining a thuja seedling, you should pay attention to the following points:
- It is advisable to choose those seedlings that have a symmetrical shape.
- If the seedling is lush, then most likely its root system is good, which means it will quickly take root and grow.
- The color of the needles is usually light or dark green, with the exception of certain varieties, which have a yellow or even slightly golden color of the needles. If the color of the seedling is brown, then most likely it does not receive enough nutrients.
- If you notice strongly protruding plant roots from the drainage holes in the pot (they should stick out slightly - that's even good), then this can only mean one thing: this ephedra has not been sold for too long. You should not buy and save such a tree.
- Naturally, the trunk of the seedling should not show any damage to the bark or signs of disease.
- You can check whether the thuja is alive as follows: squeeze the needles in your hand, hold it a little and release it. If she instantly recovers and straightens up, then everything is in order with the tree.
- Another way to check the root system: take the tree by the top and lift it up. If it suddenly slips out of the pot, then most likely, the roots of the plant did not take root in an earthen coma, or the manufacturer cut them off during transplanting the seedling.
- The next tip is a little unexpected: if you notice that weeds are growing in the pot, then this is a good sign, because this means that the thuja has already wintered in this container for at least one season, and such a plant is very strong, it has adapted to our winter conditions ... And this is just a great option to buy.
- If you are allowed to get a seedling along with a clod of earth from the pot, then you should carefully consider the color of its roots. If they are white with a pinkish tint, everything is fine, but if you notice that they are brown and soft to the touch, then, unfortunately, this ephedra was poured, and the process of root rotting began.
Technology of planting thuja in open ground in spring
When is it better to plant and approximate planting dates
The most optimal time for planting a thuja isearly spring, even before the sap flow begins.
As for the exact dates, you can do the spring planting immediately after the ground warms up a little, that is, in March-April, depending on the weather conditions in your region (in the Middle Lane, this is the second half of April).This is due to the fact that it is at this time that the active phase of growth of both the coniferous shoots and its roots begins. And it is at this moment that the plant will best tolerate transplanting (planting a seedling from a container into the ground). What's more, the root ball is likely to be slightly frozen and will remain intact when planted. Plus, the plant will have plenty of time before winter to take root and grow strong roots.
You can also plant thuja in summerbut it is more difficult. This ephedra is very sensitive to drying out of the roots (however, all conifers are like that), so the summer planting should be done as quickly as possible, and for this you should prepare well in advance and take everything you need.
Air temperature during landing thuja should not, if possible, be higher than 20 degrees. It is ideal to plant thuja in the morning in the summer, then the temperature is lower and the humidity is at a fairly high level.
main feature autumn landing thuja consists in the fact that the ephedra has not yet developed a sufficiently powerful root system. This means that in winter the thuja can tilt strongly, especially during snowfall and in strong winds. So don't forget to secure the tree after planting, for example by tying it to a support.
Place in the garden
If you can choose the most optimal place for growing thuja in your garden, then in the future you will not have to diligently care for it and deal with yellowing or shedding.
By the way! The site has a separate article about the reasons and ways to combat the yellowing of thuja needles.
Optimal place for planting thuja - sunny area near the fence, i.e. in light partial shade. In such a place, the plant will be protected from drafts, especially winter dry winds affect it. In addition, having planted a tree in a slightly shaded place, the plant will receive enough sunlight for good development, and you can prevent its shoots from burning in the sun.
Of course, you can plant thuja in the shade, but in such conditions it will not be able to please you with its splendor, and its needles will most likely thin out.
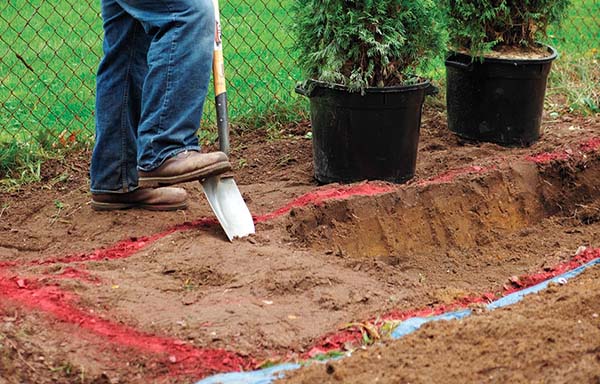
By the way! If you still want to grow a thuja hedge, then they should be planted at a distance of 80-100 centimeters from each other. Moreover, to obtain denser landings, it is better to plant them in 2 rows in a checkerboard pattern, while the distance in the aisles should be about 100 centimeters. So the plants will not interfere with each other and will be able to develop normally.
Naturally, you should not plant thuja where groundwater is located closer than 1 meter from the earth's surface. This ephedra loves moisture very much, but does not tolerate stagnant water.
You should not choose places next to large trees with a spreading root system, in which case thuja simply cannot grow normally, since larger trees will suppress it and take all nutrients from the soil.
Landing pit
The size of the planting pit should correspond to the size of the thuja root system and vary depending on the composition of the soil. As a rule, the diameter of the adult crown of a plant is about 0.8-1 meters, therefore, ideally, the diameter and depth of the pit should be at least 40, and better even 60 centimeters. At the same time, if you have light soil (sandy loam), then a hole can be dug 40 by 40 cm in size, but if the soil is heavier and more clayey, then 60 by 60 cm is better.
Note! Even if your seedling is small, the hole should still be large, because one must proceed from the average size of an adult plant.
Nevertheless, as a rule, a planting hole for container plants is made simply 2-3 times larger than an earthen coma (pot).
Soil mix
The main guarantee of healthy development, rapid rooting and well-being of thuja is not only a correctly chosen planting site and a planting hole dug out for all recommendations. It also needs to be completed with a suitable potting soil.
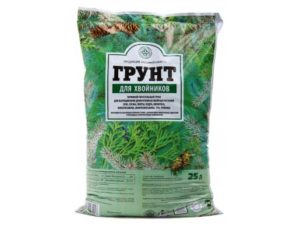
You can prepare the soil mixture yourself or use a ready-made option by purchasing a special soil for conifers (conifers) in a garden store.
If you could not find a suitable ready-made soil, or it seemed to you that it would be cheaper to make it from individual components, then you can use the following recipes for self-preparing soil for planting thuja (for heavier soil, it is better to use recipes with sand content):
- 2 parts of sod land, 1 part of peat.
- 2 parts of sod land, 1 part of humus, 1 part of peat.
- 2 parts of sod land (or leaf), 1 part of peat, 1 part of sand.
- 2 parts of leafy land, 2 parts of sand, 1 part of peat, 1 part of humus.
- 3 parts of sod land, 2 parts of humus and 1 part of sand.
Mix everything well and preferably (for speedy rooting) add another 30-40 to the soil mixture superphosphate and 20-30 potassium sulfate (potassium sulfate) or nitroammofoska.
Moreover, it is especially important to mix the mineral fertilizers well with the ground, so as not to burn the roots of the young plant.
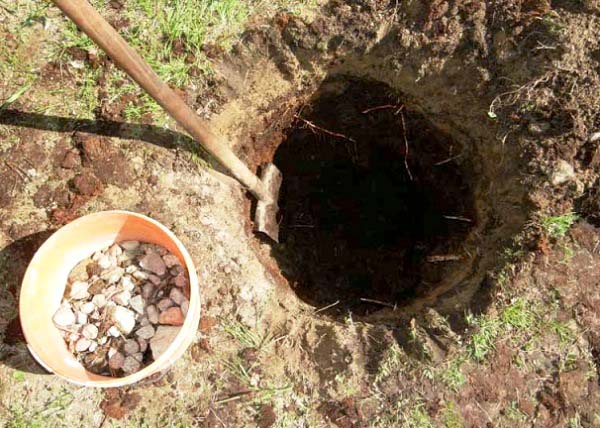
If at your summer cottage the ground is heavy and clayey (or the groundwater is too close), then in addition to digging the largest possible hole, it is very important to lay a good one at the bottom of the planting hole. drainage... The required thickness of the drainage layer is about 10-15 centimeters, depending on the degree of lightness of the soil. You can use gravel, expanded clay, crushed stone or broken brick as drainage.
Step-by-step landing instructions
Note! Before you start planting thuja in the ground, prepare everything you need in advance so as not to waste time later, because everything needs to be done quickly... You should remove the thuja from the pot only after you make a hole and fill it with potting soil, and also try on how it stands in it. This requirement is explained by the fact that the root system of the ephedra dries out very quickly, literally in 10-15 minutes, and this cannot be allowed.
Step-by-step instructions for planting a thuja in open ground:
- Choose the best place on the site.
- Dig a planting hole of the required size and lay drainage.
- Prepare soil mixture according to one of the recipes, or purchase ready-made soil for conifers.
- 30 minutes before planting, it is recommended to spill the pot with the plant with water or even better with a root stimulator (preferably Kornevin or Heteroauxin, although you can use Epin or Zircon). Such a procedure will help in the future to more conveniently and accurately get an earthen lump with a seedling.
- Throw so much soil into the hole so that when you put an earthen lump with a seedling, it will be in such a position that its root collar is 3-5 centimeters above ground level. The soil will subsequently sink, and as a result, the root collar of the plant will be at ground level.
Remember that if you deeply deepen the root collar or, conversely, raise it above the ground, the plant will suffocate and dry out.
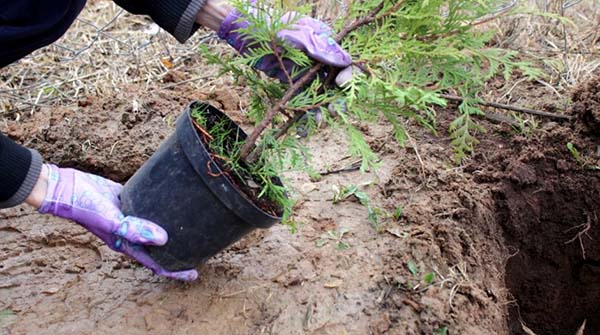
In order to easily remove the seedling from the pot, put it on its side and gently knock on the pot with a shovel, and then carefully pull the plant out by the bottom of the trunk.
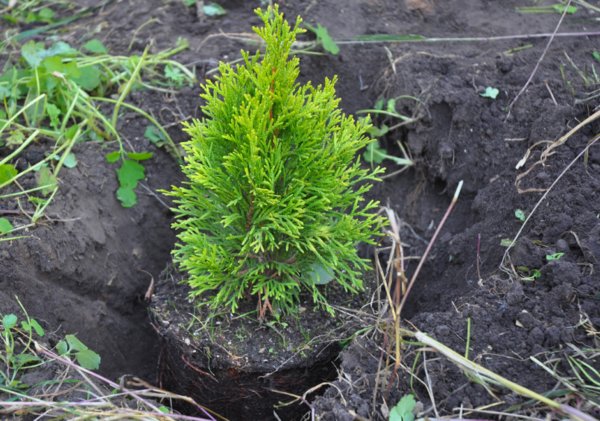
- Place the seedling in the center of the planting hole.
- Fill the hole with the remaining soil mixture and compact well.
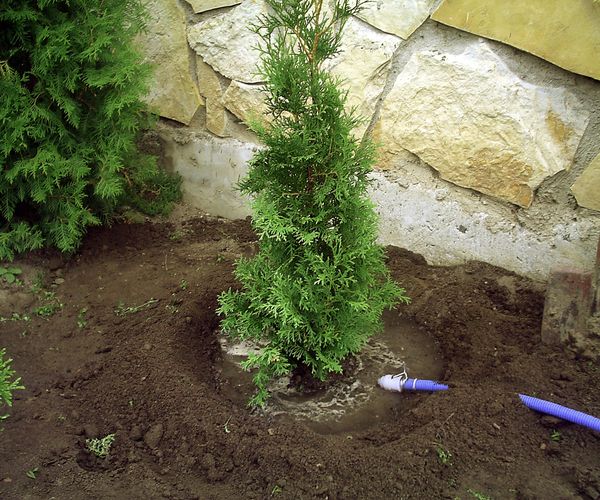
- Then you need to fill the planting hole with a bucket of water for better soil shrinkage.
- As soon as the water is absorbed, it is necessary to add soil again and tamp, make a hole for irrigation and pour out another bucket of water.
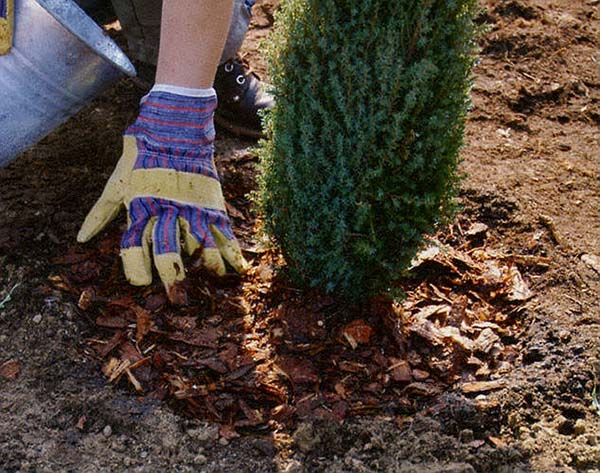
- The final touch is to mulch the hole for better moisture retention in the soil by 3-5 centimeters (up to 10 cm). You can use peat, compost, shredded bark, or wood chips as mulch. By the way, mulch will protect the ephedra not only from drying out, but also from overheating and freezing in winter.
It's important to know! Thuja, especially a young one, loses a lot of life-giving moisture through the crown, therefore, after planting, it is recommended to shade it with an awning made of a shading mesh or a frame made of spunbond. Just make sure that it does not fit snugly against the plant, otherwise it may simply clash.
Video: how to plant thuja correctly
Thuja care after spring planting and rules for further cultivation
The main care for thuja in the open field consists in watering, although you should not neglect feeding. Do not forget that this ephedra should also be periodically trimmed (cut) and covered, or rather shaded for the winter.
Watering thuja should be carried out systematically, especially in the first month after planting. The average plant's need for watering is about 2-3 buckets per week. When you water the recently planted thuja, the soil will settle, so you should fill it up.
Advice! Thuja will be very grateful to you if you water it by sprinkling during hot periods, especially in dry summer weather. This will not only saturate its shoots with nutritious moisture, but also cleanse the ephedra of dust and dirt. Moreover, it is better to do this either early in the morning or in the evening, when the sun goes down. Not at lunchtime.

Periodically, especially after watering, the soil in the thuja trunk circle is requiredloosen (to a depth of 5-10 centimeters) and weed from weeds, so that they do not take moisture and other nutrients from the young ephedra.
Important! If you feel sorry for water for thuja, then it will begin to turn yellow and crumble (thin out).
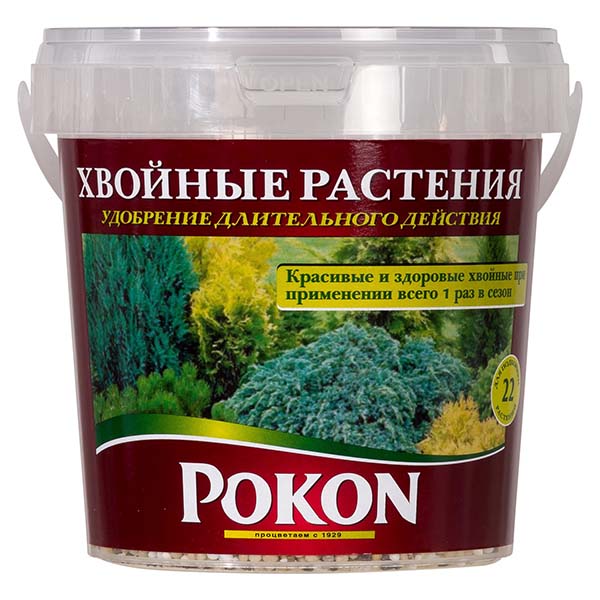
The first top dressing thuja should be performed one year after planting. That is, if you plant thuja this spring, then you should only feed it next spring. For spring and early summer dressings, it is good to use urea or ammonium nitrate (just by embedding fertilizers in the soil), or a complex fertilizer, such as "Kemira Universal". Also for feeding you can use special long-acting fertilizers for conifers, such as "Pokon".
An important component in the care of thuja is its pruning... As a rule, all types of pruning are carried out in autumn (late summer) and spring (early summer).
By the way! Read more about preparing thuja for winter, trimming it and covering it, you can by this link.
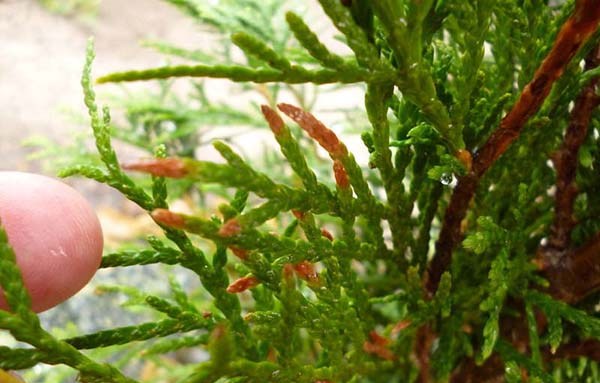
Often, novice gardeners are faced with yellowing of thuja needles, especially after winter - in early spring.
Advice!The site already has a detailed article about why thuja can turn yellow and what to do in each of the cases.
Thus, it is obvious that even a novice summer resident can, without much effort, grow a beauty full of vitality on his site. You only need to direct all your energy in the right direction, taking into account all the tips and recommendations outlined in this article.
Video: Tuya Smaragd - planting, feeding and reproduction