

Planting and growing potatoes using Dutch technology
Potatoes are an undemanding plant that produces consistent yields of quality tubers. But with improper planting and ignorance of the features of care, the yield decreases sharply. Recently, the Dutch way of growing potatoes has become very popular.
This method creates optimal conditions for the root system of the plant, and as a result, an intensive formation of tubers occurs in comparison with the conventional method. For the most part, it is used on farms, but it is a versatile technology, and for this reason it can be successfully used on ordinary summer cottages.

Content
The specifics of planting and growing potatoes according to Dutch technology: advantages and disadvantages of the method
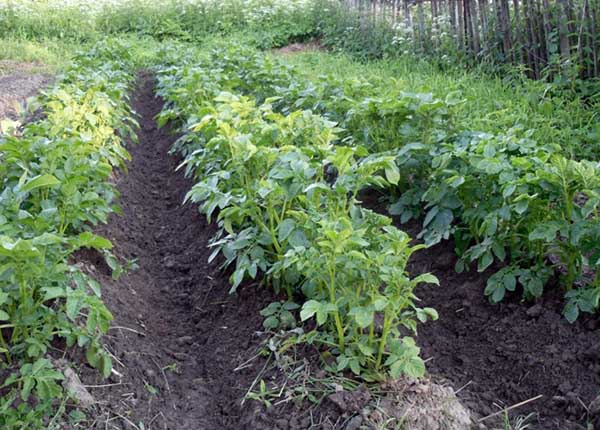
In short, the main principle of the Dutch method of growing potatoes is to abandon holes and beds altogether, instead of them they make long furrows in which the prepared tubers are planted.
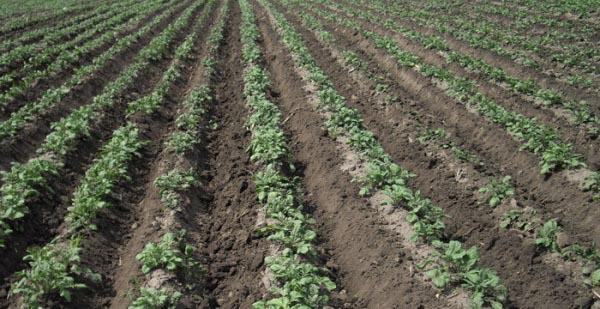
The positive aspects of growing potatoes using Dutch technology include the following points:
- Tubers are placed no deeper than 10-15 cm from the soil surface, which allows oxygen to freely penetrate to the roots.
- Moisture does not accumulate in the furrows, which prevents root rot.
- All bushes are well lit by the sun, this allows the potatoes to form a good harvest.
These advantages make it possible to collect about 1.5-2 kg of potatoes from each bush. But keep in mind that such a result will be only if all the recommendations are fulfilled, which complement each other and do not act independently.
The bulk of the Dutch varieties are mid-early to mid-season, they develop quickly and form a harvest early. Less commonly, late varieties are planted using this method.
Dutch potato growing technology: rules, recommendations and instructions
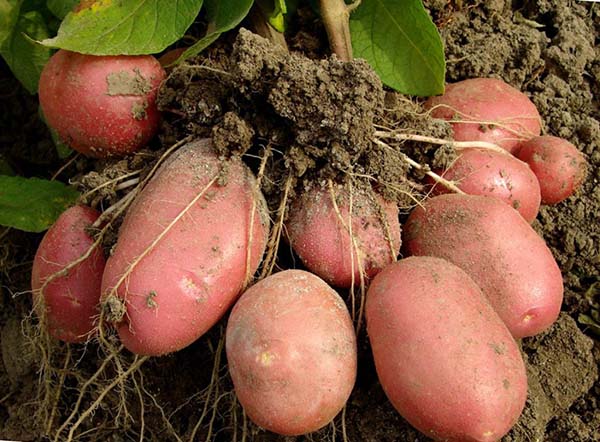
The peculiarity of the Dutch potato varieties is the correct shape, small eyes, an attractive appearance of the tubers. However, the tops of Dutch varieties are often affected by late blight, for this reason, plants need to be treated with fungicides (drugs against diseases) during growth. Most of these varieties work well against scab and other potato infections.
Soil and bed preparation
Growing tubers using Dutch technology begins with choosing a place and preparing the soil on the site. The garden bed should be located on level ground, without the slightest tilt. You should not choose a place in the lowlands where melt and rainwater collects. You need the sun to illuminate the potato bushes all day. It is important that the area with potatoes is not located where the wind often blows, which quickly dries the beds. The soil should be water-permeable, contain a lot of air, light and fertile.
Important! It is good to place the potato beds where cereals, beans or peas previously grew.
You need to prepare the soil for the potatoes in advance, mark the beds and dig up the ground. Preparation begins in the fall, dig up the area to a depth of about 25-30 cm (shovel bayonet), add organic matter and add 300-400 gr. superphosphate and 200-300 gr. potassium sulfate for every hundred square meters.
With the onset of spring, urea is added to the site in the calculation of 100-200 gr. per one hundred square meters and processed with a cultivator cutter or in suburban conditions loosened with a pitchfork to a depth of about 15 cm. This allows you to preserve air chambers in deep soil layers, through which air will circulate and water flows to the roots.
Preparation of planting material
For planting using Dutch technology, you need to choose intact potatoes 3-5 cm in diameter and weighing about 50-60 g, there is no point in using smaller tubers - the shoots will grow too weak. Make sure there are at least 5 eyes on each tuber.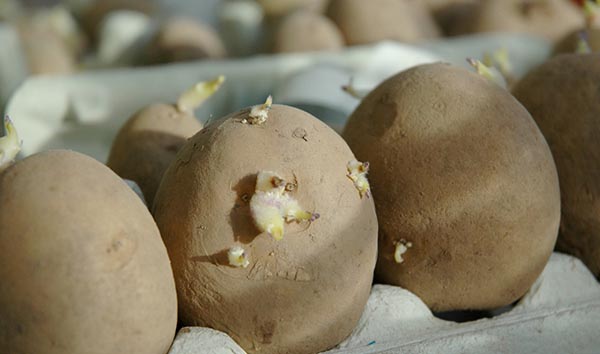
A month before planting in the soil, you need to germinate potatoes. It is germinated within a month in a dark place at a temperature of + 16-18 degrees, scattered in a single layer on newspapers or cloth spread on the floor.
According to the Dutch method, tubers are planted when they have sprouts 5-8 mm long, of which there should be at least 5 pieces. Those processes that are longer than 1-2 cm will simply break off with a mechanical planting, but for a manual (summer cottage) option, they are quite suitable.
Attention! Planting sprouted tubers is a 100% guarantee of germination.
For planting, it is better to choose elite Dutch varieties than the first, at least the second reproduction ("elite" and "super elite"), because they resist disease well, they have regular tubers, and the plants are highly productive. Growing several varieties of different early maturity makes it possible to extend the productive period and feast on fresh potatoes for several months.
Important! Tubers for planting must be purchased in specialized stores or nurseries, and not at agricultural fairs, and even more so not from hands, otherwise such savings will certainly come out sideways.
The most popular varieties of Dutch potatoes in Russia are:
- Santa;
- Red Scarlett;
- Romano;
- Mona Lisa;
- Cleopatra;
- Asterix;
- Eba;
- Ukama;
- Latona;
- Condor.
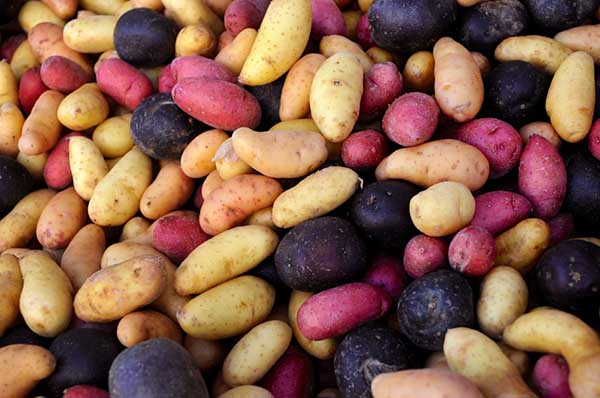
Thanks to the main advantage of the Dutch varieties - good yield, from 1 hundred square meters (100 square meters) you can harvest from 200 to 400 kg of quality tubers.
Planting tubers
Advice! The site already has a separate detailed article about when to plant potatoes (including the lunar calendar).
Step-by-step instructions for planting potatoes
The Dutch method involves planting tubers immediately after finishing the preparation of the site. The delay will lead to the drying out of the earth and the loss of positive qualities. Work can be started immediately after the soil warms up, dries slightly and stops sticking to the shovel.
Place for planting and growing
A person who comes across this method for the first time will immediately think that a lot of space is wasted in vain, since 1 sq. meter has only 6-8 tubers. But the prudent Dutchmen calculated everything - sprawling plants with strong roots grow, and you can get a better harvest than using the usual technology.
Dutch technology will provide the tuber:
- a lot of heat;
- a sufficient amount of air ("ventilation" of the root system);
- the required amount of nutrients.
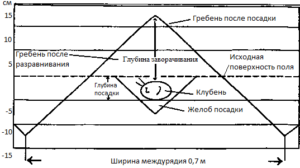
It is required to choose a site with a deep arable layer, because the tubers must be immersed to a depth of 10-15 cm. When the first seedlings appear, they are sprinkled with soil on top. When the sprouts appear again, the procedure is repeated. As a result, the planting depth of potatoes is the same as with the conventional planting method.
Dutch potato planting scheme
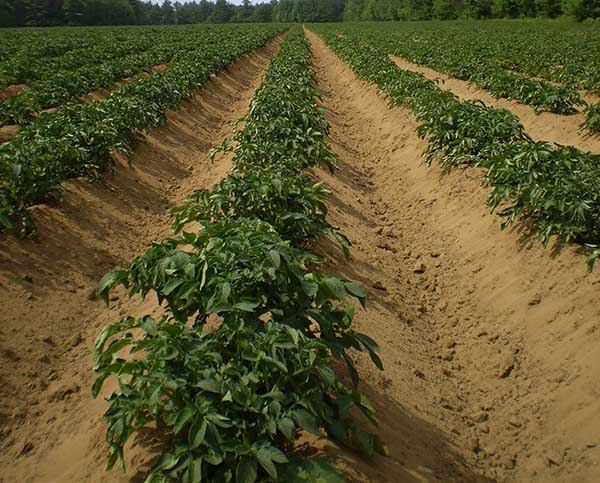
Potatoes planted according to the Dutch method must have sufficient feeding area. therefore between the rows leave free space of about 70-75 cm (better than 80 cm), a bushes place in the ranks at a distance of about 25-30 cm (preferably 35 cm).
Which gives a large distance between plants:
- For hilling, the soil from the rows is used, for this reason the tubers are located above the ground level. The ridges are well warmed up in the sun, there is enough air for the roots
- In a rainy summer, plants will not die from excess moisture, water will drain between the rows.
- In a dry year, the amount of moisture necessary for growth remains in the ridge.
Fertilizers are poured into the holes so that the tuber is located under them. Good humus or rotted manure is used as fertilizer during sowing. If you have no manure, you can use some dry chicken manure (over 1 year old). For potatoes, the ideal top dressing is crushed egg shells and wood ash... Eggshells need to be poured about a handful, and wood ash should be taken about 30-50 grams. for each hole. If you add a little onion peelsthen this will save the potatoes from wireworm.

In the holes, the tubers are placed with sprouts upwards and after that they are covered with soil by 4-6 cm. A week later the first sprouts of weeds should appear. They must be destroyed immediately before they have time to take root.
Caring for potatoes after planting
After the emergence of shoots (and this usually happens after 2-3 weeks), the planting is spud so as to raise the height of the ridges is up to 8-12 cm and the width is up to 30-35 cm, and before that all the weeds are removed.After 4 weeks, the soil near the seedlings is carefully weeded and after that the soil is shoveled from the row spacing so that the ridges are already raised to the height about 23-30 cm, and at the base the ridges should be width near 70-75 cm.
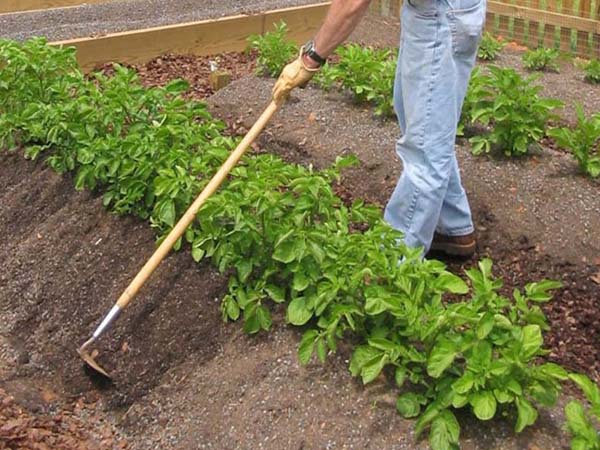
Further weeding and hilling by Dutch technology is not expected. As for the removal of weeds in the aisles, then, according to Dutch technology, they use herbicides... These drugs include: "Titus", "Zellek super", "Centurion", "Lazurit" and others.
To water site need no more than 3 times... The first time you need to moisten the area before flowering, again - 10 days after flowering, the last time - after the end of flowering, at this time tubers begin to grow.
By the way! If you completely follow the Dutch cultivation technology, then it assumes the presence of a drip irrigation system.
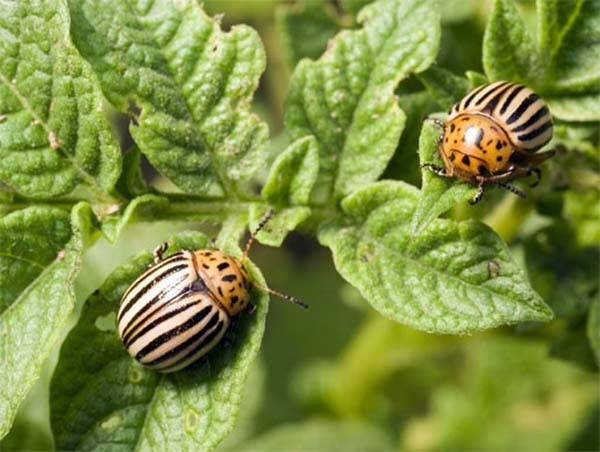
Diseases and pests
On the potato plantation, it is necessary to carry out preventive treatment with pest control agents. Late blight is a real danger to most varieties of Dutch potatoes. To combat a pathogenic fungus, it is advisable to use only insecticides or preparations of biological origin. Naturally, you will also have to resist Colorado beetle and wireworm... It is recommended to carry out treatment against these pests strictly before the flowering of the bushes.
Important!About, how to get rid of the Colorado potato beetle described in detail in this material, a about methods of protection and effective fight against wireworm toldin this article.
Harvesting
It is very important to remove the potatoes on time. Tubers left in the garden for a long time lose their taste, and their shelf life is sharply reduced.
Note!You will find all the information on how to determine that potatoes are ready for harvest.here, a about how to store it for a long time here.
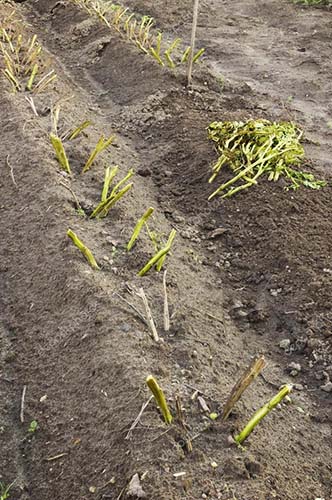
You need to prepare for the collection of tubers, for this you need remove tops from potato bushes 10-15 days before harvest, leaving only bare "hemp" about 5-7 cm high. Then the tubers are kept in the soil for another 10-15 days until they ripen and a strong peel is formed on the tubers. The potato tubers are then less damaged during harvest and will be better stored.
Potatoes for food or sale are harvested in late August - early September, and seed potatoes much earlier - in late July - early August.
Attention! On large plantations, the tops are not mowed, but a desiccation method is used, this allows the green mass to be dried using special formulations to simplify the subsequent harvesting.
Thus, planting potatoes in the Dutch way is common in most European countries and is widely used on our farms. You just need to strictly adhere to the rules of planting and care, and a rich harvest is guaranteed.