

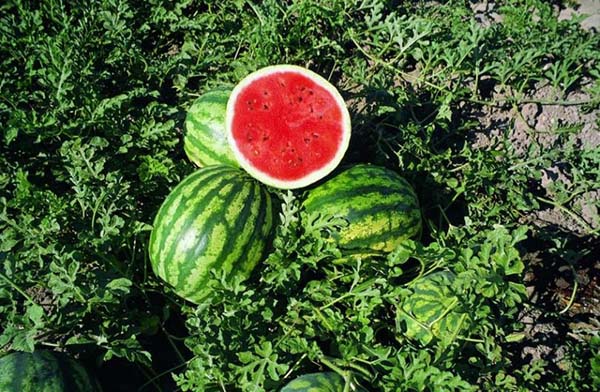
Planting watermelons in open ground or a greenhouse: rules for care and cultivation
Watermelon, as a southern culture, is especially demanding for heat and sun. But despite this, even in the relatively short summer of the Middle Belt, as well as in Siberia and the Urals, it can be successfully grown in open ground (although, of course, it is better in a greenhouse). To do this, you need to know some of the nuances of planting and caring for the berry.
By adhering to our recommendations and tips for self-cultivation of watermelons from seeds in the open field or in a greenhouse, you can get a luxurious and high-quality harvest in your beds.
Content
- 1 When to plant watermelons outdoors or in a greenhouse
- 2 Planting watermelons: choosing a place and soil
- 3 How to plant watermelon seeds directly into the ground
- 4 Grafting a watermelon on a pumpkin or lagenaria
- 5 How to care for watermelons in the open field and greenhouse: growing rules
- 6 Diseases and pests of watermelons
- 7 When to harvest watermelons and how to store them
When to plant watermelons outdoors or in a greenhouse
When choosing the timing of planting watermelons in the ground, you must pay attention to the following circumstances:
- climatic features of the growing region (when the soil warms up to + 15-16 degrees, and the night temperature does not fall below the same + 15-16 degrees);
- the place or conditions for further cultivation (you can plant it in the greenhouse 7-10 days earlier, in the open ground later).
But besides this, experienced gardeners pay attention to favorable dates for sowing watermelon seeds according to the lunar calendar.
Depending on the region and climate
Only in the southern regions, watermelon seeds, as a rule, are immediately planted directly in open ground.
In colder regions watermelons are grown through seedlings.
However, if you warm up the garden in advance or plant it in a greenhouse, then you may well be able to count on success.

Thus, on South of Russia watermelon seeds are planted in open ground at the end of April-beginning of May, inMiddle lane - late May-early June. At the same time, watermelons are planted at Urals and Siberia.
Actually, watermelons are planted at a similar time in the North-West (in the Leningrad region)
According to the lunar calendar, in 2020
Favorable The terms for sowing watermelons in open ground or a greenhouse, according to the lunar calendar, in 2020 are the following days:
- in April - 1, 2, 24, 25, 27-30;
- in May - 2-4, 6, 15-17, 20, 21 25-31;
- in June - 2-4, 11-14.
However, the summer resident does not always have the opportunity to sow at the specified time (in the spring, not only watermelons are planted), therefore it is important to know when it is strictly forbidden to sow (the days of the Full Moon and New Moon, as well as the period when the Moon is in Aquarius, because . is a barren and dry sign -italicized), and these dates must be taken into account in your spring calendar.
In this way, unfavorable days for planting watermelons in 2020 are the following numbers:
- in April - 8,15-17, 23;
- in May - 7,13-14, 22;
- in June - 5,9-11, 21.

According to the lunar calendar, from the magazine "1000 Tips for Summer Residents".
Planting watermelons: choosing a place and soil
When you choose a place in the garden for melon, then you should choose most sunny plotnot shaded from the south and not blown from the north by cold winds.
In partial shade, or even more so in the shade, you will not get any watermelons!
Then plant: crop rotation rules
It is very important to consider what has grown in the garden in the past.
So, you should not plant watermelons if they grew in the same place before:
- nightshades (potatoes, tomatoes, peppers, eggplants);
- pumpkin (pumpkins, zucchini, squash, melons and watermelons themselves).
It is ideal to plant watermelons in the garden where they were sideratessuch as vetch, lupine, alfalfa, sweet clover and other legumes, as well as cabbage, onions or garlic.
The soil
Best suited for growing watermelons sandy and sandy loam the soil... In other words, it should be very loose and naturally fertile.
However! If you have exceptionally sandy soil, then experienced melon growers still recommend adding a little clay to the planting holes, because it also contains its own trace elements, moreover, it is a good holder of moisture.
Preparing the garden
Of course, most gardeners know that the garden for planting watermelons (and for any other crops) should be tidied up in the fall. To do this, you need to dig up the soil on a shovel bayonet (or even better by one and a half) and add organic matter (rotted manure or humus), as well as mineral fertilizers (potassium sulfate, superphosphate - all according to the instructions, somewhere around 20-40 grams per square meter).
Important! If you have enough heavy and clayey soil (loam), then it is advisable to also make a digging sand.
It is possible to prepare a garden bed or holes (dig holes 30 to 30) in the spring, just before planting, but it is better at least a month or a couple of weeks.
Advice! In the Middle Lane (Moscow region), in the Urals and in Siberia, it is advisable to grow watermelons in high beds (initially in tunnel greenhouses) or greenhouses, because for melons, the most important thing is that the roots are always warm.
So, in the spring you can shed your beds or planting holes with a solution of Baikal EM-1, and then add wood ash... Or, for digging, add a complex mineral fertilizer to nitroammofosk (according to the instructions, somewhere around 30-40 grams per 1 square meter).
Important! After you prepare the bed, 10-14 days before planting seedlings or planting seeds, it should cover with foil (or white non-woven) and put a mini-greenhouse on top on arcs... During this time, the earth will warm up as deeply as possible.
It will be even better if before you lay hay or dried grass in the planting holes, and then again sprinkle with earth from the dug hole. Due to the decomposition of hay, additional heat will be generated.
Video: preparing the garden for planting watermelons and melons
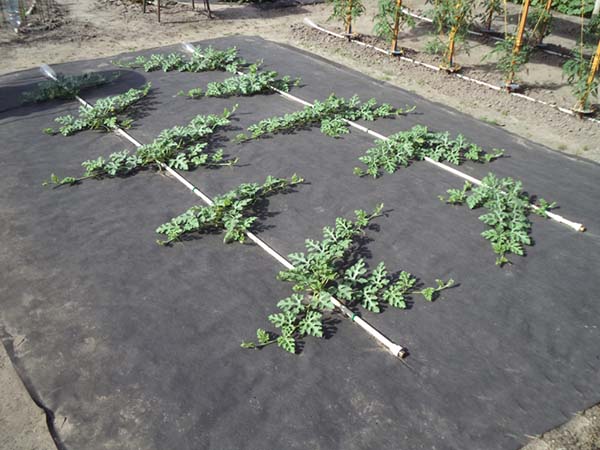
And in the next video, the author shares his experience of creating a garden for watermelons using black agrofibre, on which for better warming up also a greenhouse is being erected.
Video: preparing a garden for watermelons
How to plant watermelon seeds directly into the ground
So, you have decided on a place to grow your watermelons, made a bed. Now is the time to prepare the seeds themselves and sow them correctly.
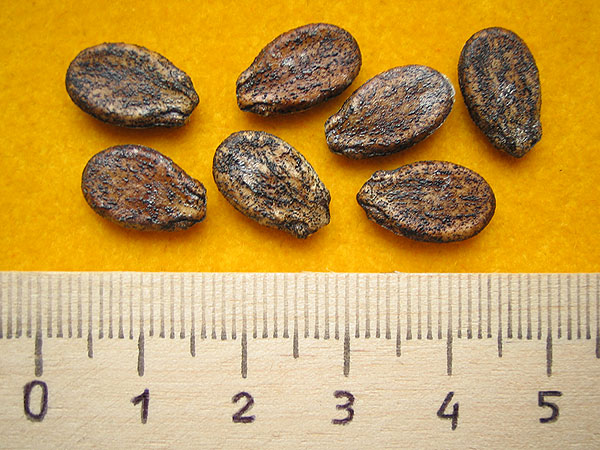
Presowing seed treatment
To prepare the seeds of watermelons for planting, you can carry out the following measures for their pre-sowing preparation and processing: calibration, scarification, heating, disinfection, hardening, soaking and germination.
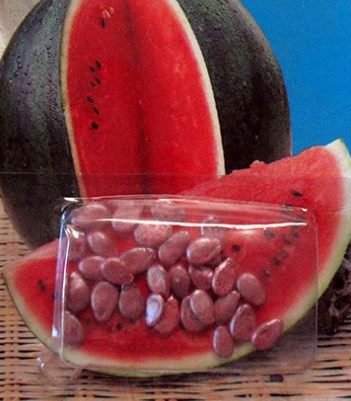
By the way! If you have prepared your own seeds, it is better that they lie down for 2-3 years, then their germination will be maximum.
Important! If you purchased pelleted (processed) seeds, then they do not need any pre-sowing preparation, they should be sown dry. As a rule, they are in a green or red sheath.
Calibration Is the distribution of watermelon seeds by size. If you sort the seed by "size", then all the seedlings will develop simultaneously and amicably.
You can discard empty seeds by immersing them in a saline solution (6-10 grams of salt per 200 ml of water). What seeds float up are empty, they can be thrown away, and those that have settled to the bottom can be processed further.
Warming up - this is an increase in the temperature of seeds in order to increase the rate of their biochemical reactions. To warm up the seeds of watermelons, you need to lower their water at a temperature of 50-60 degrees and soak in it for 30 minutes.
Scarification - this is a violation of the shell of a watermelon seed in order to germinate it as soon as possible. To do this, it is recommended to damage the shell of the soaked seed by rubbing it with a spout on sandpaper or bite the tip with your teeth, or even better, cut it with scissors.
Scarification is not necessary at all, but for the sake of experiment it is quite possible to try.
Disinfection - is the disinfection of inoculum. In order to disinfect watermelon seedlings, it is recommended to hold for about 20 minutes in a dark pink solution of potassium permanganate (1%, i.e. 1 mg per 1 liter of water), and even better in a solution Fitosporin (according to instructions)... At the end of the time, rinse them under clean water and dry until the required flowability appears.
It will be useful for summer residents from cold regions to spend hardening watermelon seeds. To do this, wrap the seeds in damp gauze and put them in the refrigerator for 10-12 hours, then take them out and put them in the heat for 10-12 hours. So repeat for 3-4 times (3-4 days), in other words, expose the seeds to temperature changes (stress), and then germinate.
Soak and germination watermelon seeds can be done as follows:
- treat the seeds with any disinfectant;
- place the seeds in moistened gauze (or on cotton pads), while you can use both ordinary water and add a growth stimulator (Epin, Zircon);
Note! The seeds should not be in water, but in a humid environment, in other words, they should have access to oxygen, only in this way (in such conditions) they can germinate.
- put in a plastic bag, tie and remove for 3-7 days in a warm place (+ 22-28 degrees) before pecking.
Important! Periodically inspect your seeds for germination, remembering to moisten the gauze (cotton wool).

Video: sprouting seeds of watermelon, pumpkin, melon
This way, through soaking and germination, you can also discard bad seeds, and hatching - they will rise and grow faster.
Direct planting of seeds
Step-by-step instructions for planting watermelon seeds in the ground (open or closed):
- Make planting holes or rows (grooves).
The planting depth of watermelons is 2-3 cm (although some sources recommend up to 4 cm).
- Moisten the wells or grooves slightly with warm water.
- Lay out the seeds according to the recommended planting pattern (for example, 100 by 60 cm or 90 by 50 cm).
Advice! But it is better to put 2-3 seeds in the holes or at a closer distance, if in the grooves. Remove weaker plants after germination.
- Cover the holes with earth or level the grooves.
- Do light watering again with warm water.
- Cover with foil or non-woven fabric.
Video: how to sow watermelons in open ground
Transplanting
If you want to guaranteed to get a decent harvest, then it is advisable to first grow the seedlings and only then plant them in open ground (under a temporary greenhouse) or a greenhouse.
Note! The site already has detailed material about planting and growing watermelons through seedlings at home.
Video: growing watermelons through seedlings
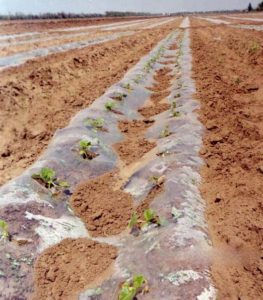
Planting on black or white agrofibre
Many gardeners from the northern regions prefer to grow watermelons under a black film, or rather under black nonwoven material (spunbond or lutrasil), covering their melons with it.
Note! However, there is also the opposite opinion. According to him, transparent film will be much more effective because under it, the earth will warm up even better (after all, black heats up more by itself than the soil).
As for the procedure itself, first prepare the garden bed and dig holes. Then cover with agrofibre, cut small cross-shaped holes into which you plant seedlings later, or plant seeds (with direct sowing into the ground). And on top you can also put a greenhouse on arcs.
By the way! In a similar way, they are very often grown strawberries.
Grafting a watermelon on a pumpkin or lagenaria
Advice! For a guaranteed harvest of melons and gourds in the Central lane (Moscow region), their seedlings should be grafted onto pumpkinand also better for lagenaria.
The fact is that the watermelon stops developing at a soil temperature below +15. Its root system, so to speak, "falls asleep", while the roots of the pumpkin (especially the lagenaria) will regularly feed the growing fruit even at a temperature of +10. In addition, they are more tenacious, powerful and almost not susceptible to disease.
Just in the future, do not forget to cut (or pinch off) the emerging leaves of the lagenaria, because if you do not do this in time, you can get the harvest of the lagenaria, not the watermelons.
For more information on how to properly graft watermelons on pumpkin or lagenaria, see the next video.
Video: grafting a watermelon on a pumpkin (lagenaria)
How to care for watermelons in the open field and greenhouse: growing rules
In order to grow large watermelons, they must be properly cared for. Next, let's talk about all the important aspects and agronomic techniques that will help you get a decent harvest even in a short summer.
Note! Caring for watermelons in a greenhouse, in principle, does not differ much from growing in open ground, except that you need to water less often and be sure to tie up, and also pollinate.
Shelter
If in your region the difference between night and day temperatures is quite significant, then the first time after planting seedlings or seedlings, the garden should be covered with something, for example, non-woven material, the same lutrasil or spunbond. Better yet, make a tunnel greenhouse on arcs.
Note! This is also done to protect plants from birds (crows), which can steal from you not only seeds, but also the plants themselves.

Advice! If there is a real threat of birds, then in the future you should also wrap the fruits themselves with non-woven material in time so that they are simply not pecked.
As temperatures rise, when the summer heat begins (in July), the lutrasil or spunbond can be completely removed.
Mulching
Many advise, immediately after planting seedlings or emergence of seedlings after direct sowing of seeds into the ground, to mulch the soil in the trunk circle. However, this is still not worth doing, since the earth will not be warmed up enough by the sun, and the watermelon, or rather, its roots will slowly develop.
We should cover the ground around the plant with mulch only when the heat comes and it grows a little.
Watering
Watermelon should be watered very abundantly and infrequently. And not only at the root, but throughout the entire area given over to melon (according to your planting scheme, for example, 100 by 60 cm or 90 by 50 cm). Wherein the water should be warm: cold can cause oppression of the plant and its poor pollination.
By the way! The site already has a detailed article about when and how to properly water watermelons in the open field and in the greenhouse.
Naturally, the frequency of watering depends on the type of soil and weather conditions. But, as a rule, watermelons are watered according to the following scheme:
- The first time, watermelons should be shed abundantly after the seedlings have 3-5 powerful true leaves.
- The next watering can be done during the budding / flowering period.
Advice! Before the onset of heat, after each watering, when the water is absorbed into the ground and the soil dries up a little from above, shallow loosening of 1-2 cm should be done.
- The third time watermelons are watered at the beginning of the formation of ovaries.
- And as soon as the growth stops (the fruits stop growing in size), and the watermelons begin to ripen (collect sugar), watering must be stopped completely.
If you continue to water the watermelons during this period (set of sugar), then this will certainly lead to their cracking, a decrease in sugar content and keeping quality.
Video: when to stop watering watermelons
Top dressing
7-10 days after planting the seedlings in the ground, when it already has 4-5 true leaves, you can perform the first feeding nitrogen fertilizer (for example, herbal infusion, solution of chicken manure or mullein, or ammonium nitrate or urea).
After another 7-10 days, you can carry out yeast feeding (10 grams of dry yeast per 1 liter of water, as well as 4-5 tablespoons of sugar; wait 4-5 hours for the fermentation process to begin).
Advice! Before applying liquid fertilizing, especially with regard to mineral fertilizers, watermelons are better well spill with water.
When the fruits are tied, watermelons can be fed with potash fertilizers (1 time in 10-14 days) - infusion / solution wood ash (200 grams per 10 liters) or potassium sulfate (potassium sulfate). Also does not hurt phosphorus... For example, a solution of the same superphosphate.
Better yet, use potassium monophosphate (which contains a lot of phosphorus and potassium).

When the watermelon stops growing in size and begins to gain sugar, then feeding, like watering, should be stopped.
Video: the best watermelon feeding for a super harvest
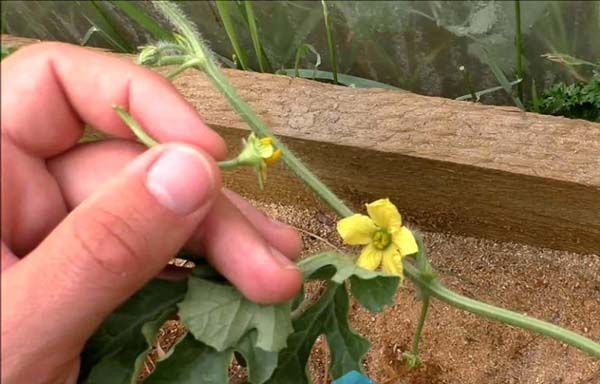
Pollination
In case of insufficient pollination due to the absence of insects and unfavorable cloudy weather (the optimum temperature is +20 .. + 35 degrees), the procedure pollination of watermelons it is desirable to hold manually, touching the male flower stamens to the female pistils (they have small watermelons at the base)
Moreover, it is necessary to manually pollinate watermelons grown in a greenhouse.
In addition, to improve tying, you can use the drugs "Ovary" or "Bud".

And also to increase the number of ovaries, you can carry out foliar (by leaves) feeding of watermelons boric acid solution (2-5 grams per 10 liters of water).

Video: manual pollination of watermelons
Formation in the open field and greenhouse
If you want to get a harvest of large fruits, as well as accelerate their ripening and improve the taste, watermelons should be pinched (shaped).
The most standard way of shaping a watermelon is to leave only one main stem, and quickly remove all the side ones (stepchildren).
And you can form watermelons in a more complex way, shown in the following diagram:
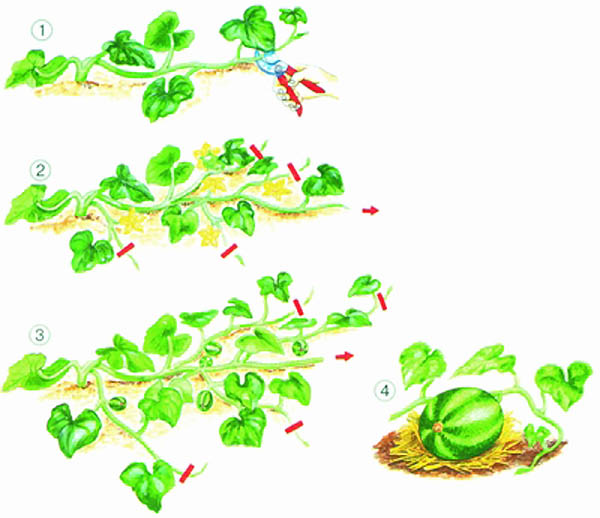
But the easiest way is to do this: after 1 fruit is tied on each of the lashes (including the main one), remove all other ovaries that will be higher along the lash (pinching after 5 leaves). Thus, no more than 3-6 fruits should be left on one plant (depending on their size and varietal characteristics).
Video: the formation of watermelons in the open field
If watermelons are grown in a greenhouse on a trellis, it is recommended to form them into 1 stem. With the appearance of 3-4 fruits, and as soon as the stem "reaches" the trellis, it is recommended to pinch the crown of the shoot.
Video: how to form watermelons in a greenhouse
Garter and hanging
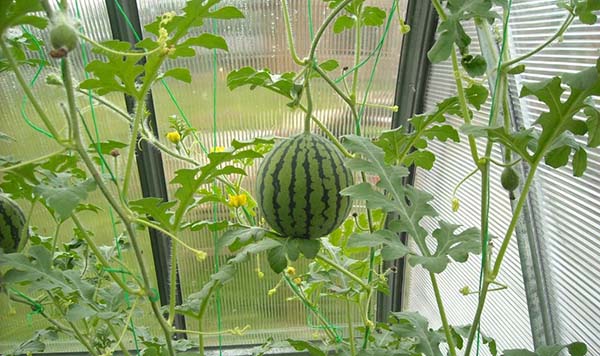
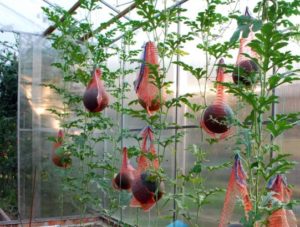
The main difference when growing watermelons in a greenhouse is the optimization of space, namely the need to tie lashes to the trellises (i.e., vertical cultivation, not horizontal, as in open ground), and in the future, and hanging fruits gaining weight.
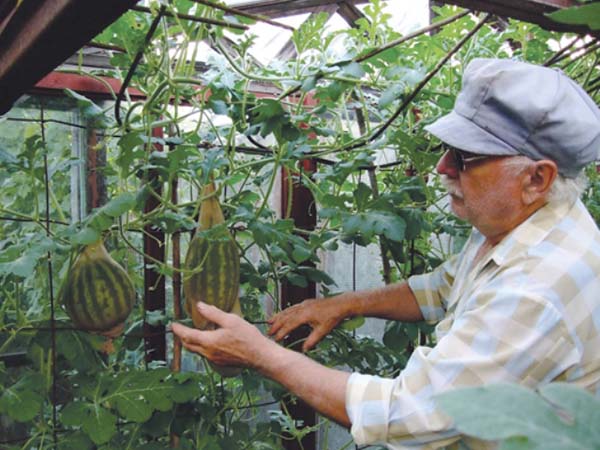
So, when the size of the fruits becomes about the size of a tennis ball, it is recommended to hang them in a net to a horizontal trellis, since there is a danger of the stalk breaking.
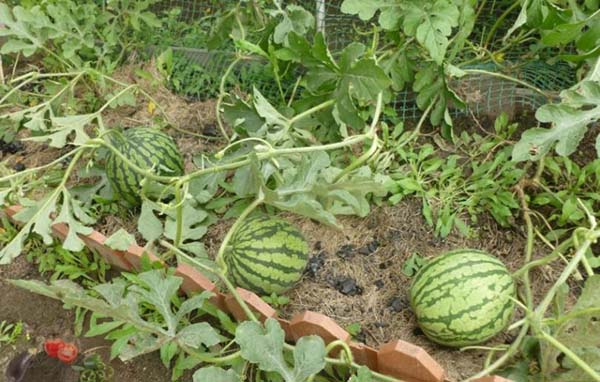
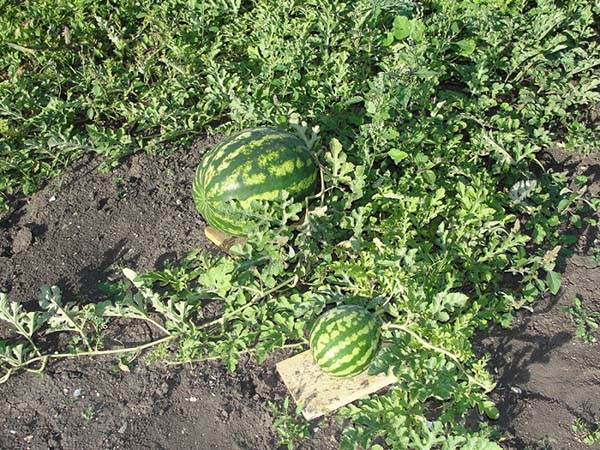
Advice! And in the open field (when grown in spread), so that the ripening fruits do not rot on not always dry ground, you can put wooden planks under them.
Diseases and pests of watermelons
Watermelons, as representatives of pumpkin (melon) crops, are attacked by similar diseases (powdery mildew, anthracnose, fusarium) and pests (melon aphids, spider mites), as well as cucumbers.
It is better to do prevention than to cure later.
To prevent pests, planting watermelons for the purpose of prevention is recommended to be treated with special insecticidal biological products, for example, Fitoverm, Bitoxibacillin, Aktofit.
If the attack is serious, in this case you will have to use chemical insecticides: Aktara, Akarin, Decis Profi, Fufanon, Tanrek.
If you are a supporter of simple but popular folk remedies, then a mixture of wood ash and tobacco dust can be used against pests, dusting the beds with them.
Concerning diseases of watermelons, then as a prophylaxis again, it is recommended to take biological drugs, the same Fitosporin (according to instructions, as for cucumbers) or Trichodermin (Trichoderma Verde).
Of course, if the disease spreads greatly, then chemical fungicides will have to be fought.
When to harvest watermelons and how to store them
It is very easy to determine that the watermelon is ripe and ready for harvesting. Near each watermelon there is a tendril and scapula (small leaf), when they dry up, then it's time to harvest (cut) the crop.

In general, there are a lot of signs and ways to check the maturity of a watermelon:
- When squeezed, a slight crackle of pulp is heard;
- When patted with the palm, a dull sound is heard;
- When pressed with a finger, the fetus seems to spring;
- The fruits acquired a beautiful waxy sheen characteristic of this variety.
By the way! About, how to choose a sweet and ripe watermelon, detailed in this material.
Storage conditions and methods
Optimal conditions for storing watermelons can be provided only in a basement or cellar, where the temperature is +1 .. + 5 degrees, the air humidity is 70-80%, and there is good ventilation.
Of course, watermelons can be stored in room setting.
Advice! The site already has an article about how to keep watermelons before the New Year at home.

Thus, if you follow all the rules and recommendations for planting and growing watermelons in the open field, you can definitely get a decent harvest. As the saying goes: "He who is enlightened is armed." Good luck!
Video: how to grow watermelons in the open field in the North-West (in the Leningrad region)