Digging and storing gladiolus bulbs: terms, processing methods and methods of preservation in winter
A huge number of experienced gardeners and just summer residents will always be interested in gladioli, because these flowers have no equal in the flower bed in their beauty, tenderness and originality. However, with the onset of autumn, the time comes for digging bulbous crops, including gladioli.
What measures should be taken so that there are no difficulties with the maturity of the tubers and the next year new roots can form, so that the bulb does not "bend" from rot and pests, and also not to overdo it with special drugs designed to protect against various diseases - all this and much more will be discussed in the material below.
Important! Gladioli must be dug up for the winter. They do not tolerate frost.
Gladioli are of early and late varieties, which means that the flowering and ripening of the bulbs occurs in the early and late periods, depending on the variety. The timing of the excavation of gladioli is adjusted accordingly.
As a rule, it is recommended to dig up gladioli at least 2 weeks after flowering (the shortest period), and even better - after 3-4 weeks. Optimally - in a month and a half, this time is definitely enough for the bulbs to fully gain mass and ripen (they have flower buds). Thus, for example, in the Middle Lane (Moscow region), the right moment occurs approximately in the second half of September (and up to mid-October).
Moreover, it is assumed that you will dig out gladioli when the first night frosts have already passed.
Advice! "People's" signal to dig up gladioli - blackening and dying of dahlia tops... Another sign - whena leaf from a birch will begin to fall.
Video: cleaning and storing gladioli
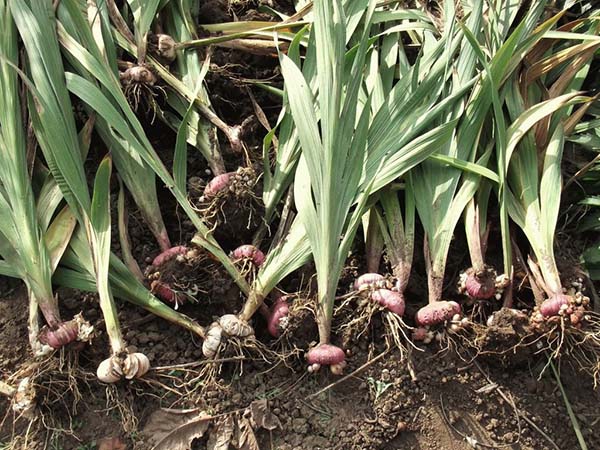
How to dig up gladioli
Tips and tricks for digging gladioli bulbs in a step-by-step guide:
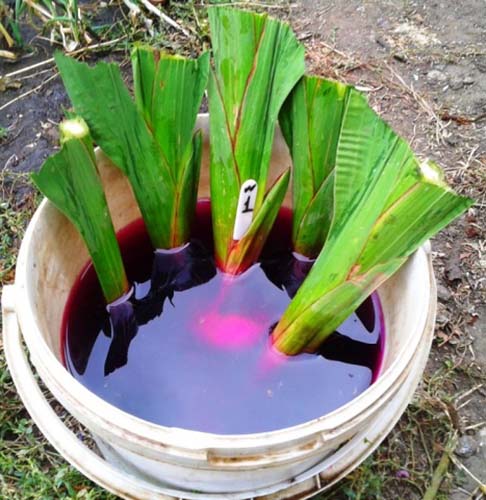
Optimally choose a fine sunny day when the weather is dry... If it has been raining recently, it is better to wait a couple of days so that the earth has time to dry out.
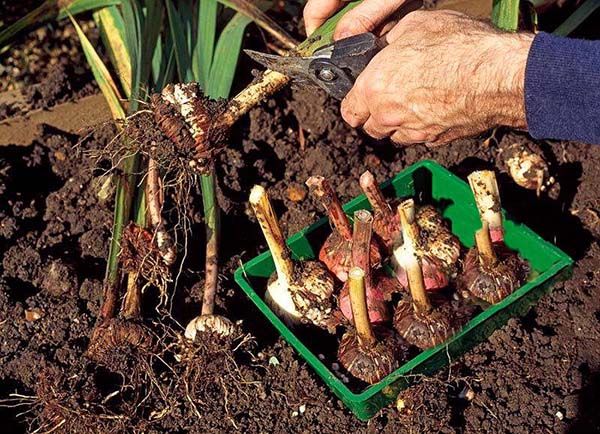
By the way! Some gardeners recommend pruning the stems before digging out the bulbs.plants, but this can be done later (for example, immediately after digging or during pickling).
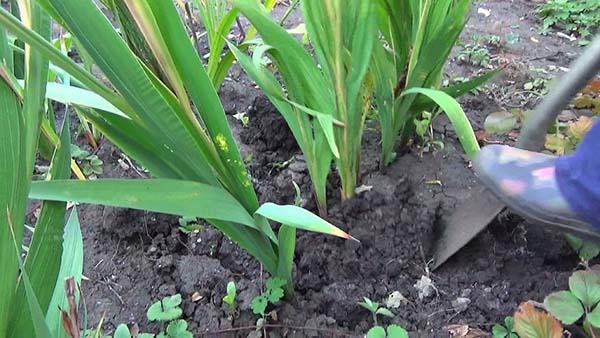
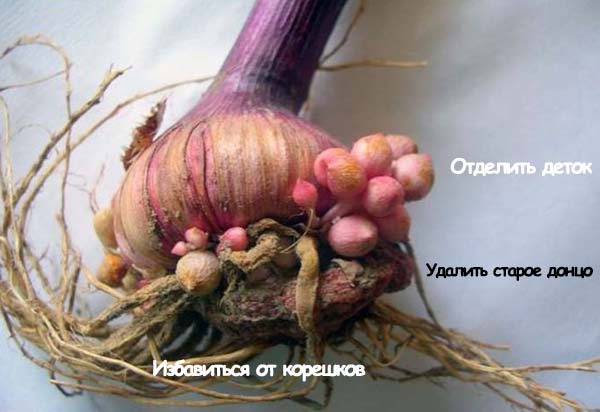
Dig needvery careful... Do not put a shovel (or pitchfork) too close, otherwise you can damage the children, which sometimes grow in the form of a kind of nest around the bulb. It is ideal to retreat 10-15 cm from the stem.
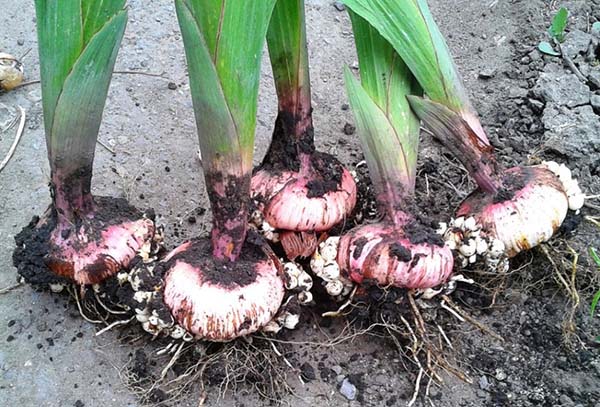
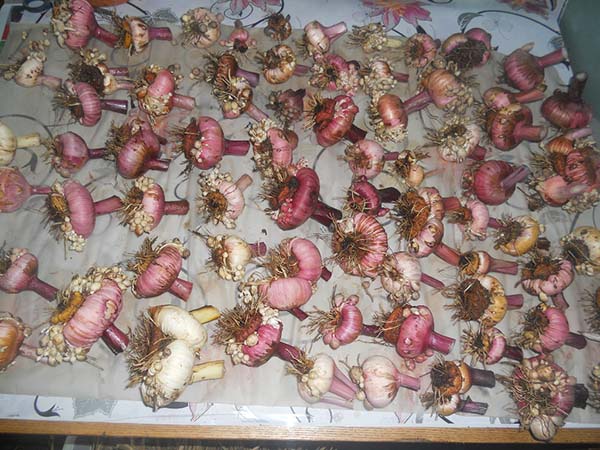
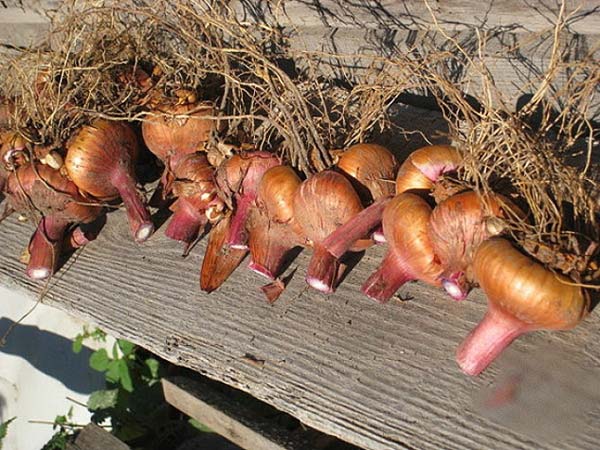
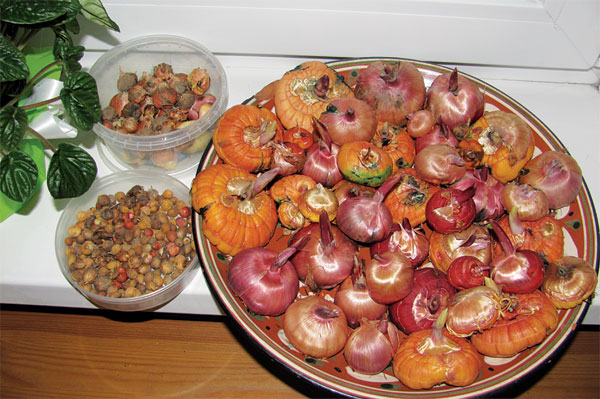
After you get the bulb out of the ground, try shake off the earth from her as much as possible and separate the children.
By the way! As for the children, if there are too many of them and they are small, then these are the characteristics of the variety. Some varieties, on the contrary, have very few of them, but they are quite large.
If the soil has not completely flaked off, then additionally rinse the bulbs in water to release the roots.
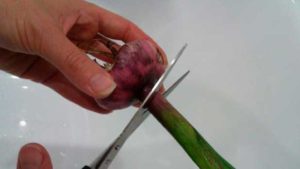
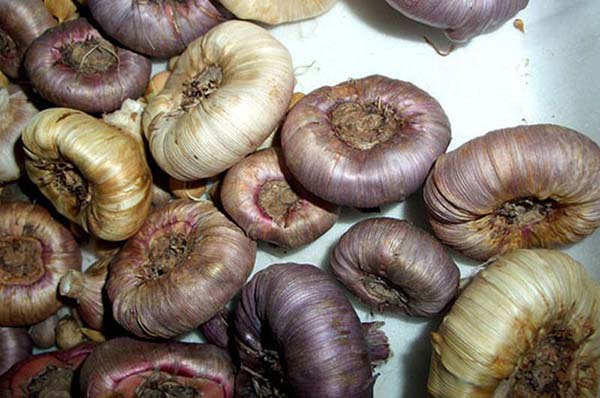
Now it is necessary get rid of the old bottom (separate by hand), which is no longer needed. The old bottom must be removed without fail, it often rots and interferes with the growth of roots.
Note! If the bulb is not ripe, then this will be difficult to do. Therefore, it is better not to rush, but to give her dry a little (let it lie down for a day or two in the sun), so that the bottom then goes well. Otherwise, you can simply damage the new bottom, where the roots are already being formed, which will negatively affect the subsequent growth next year.
Next you need remove roots... It is better to just tear them off with your hands, and not cut them off, so as not to leave hemp, which can rot during storage.
Rinse the onion well again in water.
Video: when to dig, how to dry and store gladioli
How to properly prepare gladiolus bulbs for winter storage: processing and drying
In order to fully protect flower bulbs from the harm most often caused by pests and diseases, you should properly prepare them for winter storage, or rather, process and dry them.
Important! Many summer residents recommend drying the bulbs thoroughly at a high temperature (25-30 degrees) before the treatment procedure, for example, in the open air, and after etching, dry them again, but even more thoroughly.
Video: preparing gladiolus bulbs for winter storage
Processing the bulbs after digging
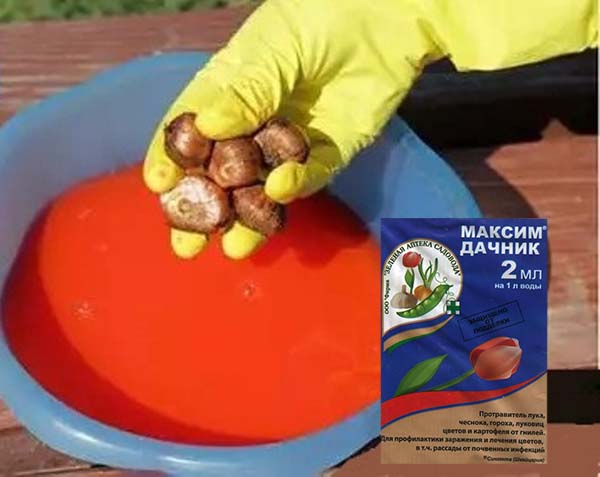
Now it is necessary to pickle the gladioli bulbs, in other words, to disinfect (protect from rot, pests) before storing them.
Perfect for processing bulbs preparation (fungicide) "Maxim"... You can also use "Fundazol" or "Vitaros"... A more standard and folk remedy is potassium permanganate (dark pink solution), but its effectiveness is very, very low.
Note! Gladioli, like other bulbous flowers, are very susceptible to attack by pests such as thrips, therefore, it is also recommended to pickle them from pests. For example, you can additionally protect the bulbs from thrips with the help of one of the following preparations (insecticides) "Tanrek", "Akarin", "Fufanon", "Actellik", "Inta-Vir", "Iskra".
Onion thrips
And if gladioli were struck bacterial diseases, then you should use a special drug "Fitolavin".
It is necessary to keep in solution on average from 20 to 30 minutes (see specific drug instructions).
At the end of the time, the bulbs need to be removed and cut off their stem, leaving a 1-2 centimeter stump.
All, it remains to dry as thoroughly as possible, and can be stored.
Drying the bulbs
In order for the gladioli bulbs to dry out properly, they should be stored at a sufficiently high temperature for the first 2-4 weeks, preferably about 25-30 degrees.
Note! Naturally, a garden house is not suitable for these purposes.
Therefore, for drying them it is better take home and store in the kitchen, somewhere near the stove, such as on a kitchen cabinet.
Or you can put the box of bulbs directly on the battery (if not very hot), or under it (if too hot).
Although, if the weather is sunny outside, it would be nice to first hold the bulbs for a couple of days in the open air(or in a polycarbonate greenhouse), but at night it is better to put them in a warmer place.
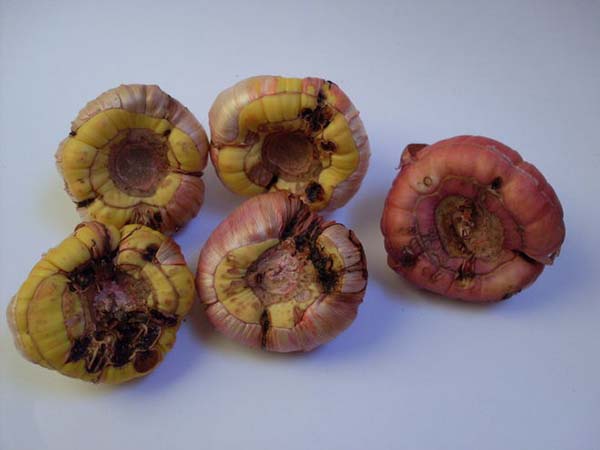
Important!If you do not dry the bulbs well, they can become sore and rot during storage.
After the time has passed, when the bulbs are dry enough, they can already be removed for long winter storage in a cooler room.
We repeat! As you already understood, the most important thing is to dry the bulbs very well before storing them. If you do everything right, you can store them quite successfully even at room temperature (+20 degrees).
Video: how to properly prepare and store gladiolus bulbs
By the way! The processing and preparation of children of gladioli, as well as their storage is similar to that of adult bulbs.
Storage conditions for gladiolus bulbs: where and how to store in winter
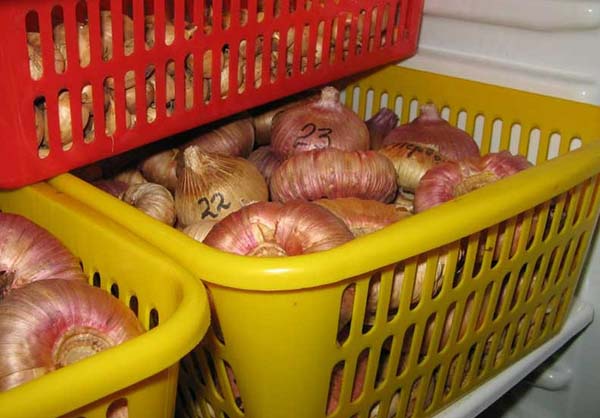
At first, the bulbs can be stored just near the balcony door or even on the windowsill. After about a month, it is better to transfer them to the vestibule or to an unheated loggia, basement or cellar (always with good ventilation), or use a refrigerator (use the bottom shelf optimally).
Note! If you put gladioli for storage in the refrigerator, then in no case use plastic or cellophane bags, since the bulbs in them will simply rot (it's another matter if there are holes in them, i.e. the bags are perforated). Ideally, they just wrap with paper or newspaper. Or do not wrap anything at all, but put it right in the boxes.
The main thing is that the place is dark, ventilated and in no case with a sub-zero temperature (optimally +4 degrees).
Note!After digging, the bulbs do not germinate for a long time, but after 45-60 days it is better to transfer them to more suitable (cold) conditions.
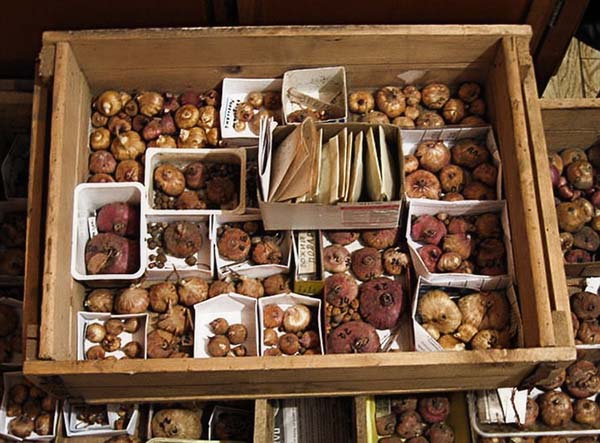
Concerning containers for storing bulbsthen smallcardboard (for example, from under shoes) or plastic boxes (containers).
You can even usethree-liter can (filling it by 1/3 or maximum half), which must be closed with a slotted lid.
Ideal temperature for long-term storage of bulbs gladioli - 3-5 degrees, humidity - up to 60%... If the temperature is higher, then they will begin to germinate, if the humidity rises, they will rot.
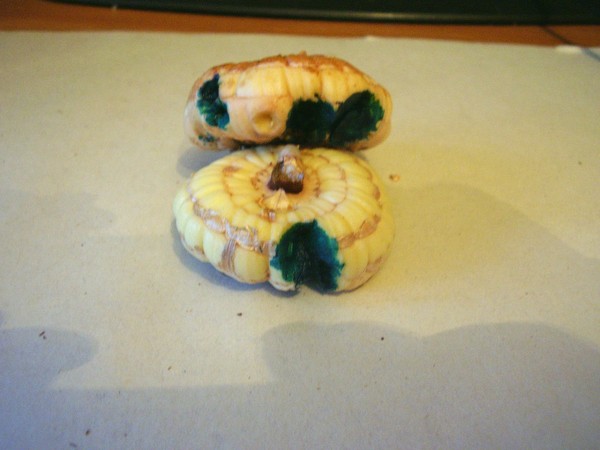
Attention! If, during storage, the bulbs of gladioli develop mold near the bottom (where the roots are), or you see any other lesions, then they should be urgently treated with the same "Fundazol", namely, sprinkled with powder (on dry). As an even better alternative - grease thickly with ordinary brilliant green.
So that next year you have only positive impressions of growing and blooming gladioli, you must pay great attention to the digging and storage of flower bulbs in the fall. You already know how to do it correctly and skillfully.So, time and bulbs do not wait! Success!
Video: when and how to dig up gladioli, tips for handling them and storing them